If your shaker bottle has developed a nasty smell, you’re probably wondering how to get rid of it fast. Luckily, a simple soak and scrub can usually banish the odor in just a few minutes.
Whether it’s lingering bits of protein or a musty scent, basic cleaning methods can make your bottle smell fresh again. Keep reading to discover quick and effective ways to refresh your shaker.
Why Shaker Bottles Smell (Even After Washing)
Even after washing your shaker bottle, odors can persist because protein residue, moisture, and bacteria hide in hard-to-clean areas. Residual whey or plant protein forms a thin film that breaks down into compounds responsible for bad smells. Moisture trapped in grooves and seams encourages bacterial growth, which releases sour or rancid odors. Biofilm can develop on microscopic scratches in the plastic, protecting microbes from regular rinsing. Lid grooves and gasket areas are especially prone to trapping residue. To effectively eliminate these odors, use hydrogen peroxide—it kills bacteria and breaks down biofilm surfaces. For a natural freshening boost, add a few drops of essential oils like lemon or tea tree to your soak to combat odors naturally. This approach addresses the root cause of smell buildup rather than just masking the surface odor. A similar principle of preventing buildup is used in cold brew can design, where smooth interiors minimize residue retention. Choosing a bottle with a leakproof, easy-to-clean design, similar to the quality and performance found in top-rated ceramic tumblers, can also reduce the crevices where odor-causing bacteria thrive. For lasting freshness, consider a tumbler with handle that features a smooth, non-porous interior to minimize bacterial hiding spots.
Warm Water and Baking Soda: Fastest Odor Fix
Baking soda is a quick and effective odor neutralizer for bottles. Use one to two tablespoons per 500 ml of warm water to create a cleaning solution. Warm water helps dissolve the baking soda thoroughly and ensures it reaches into threads, corners, and seams, where residue and odors often hide. For similar deep cleaning, metal straws can also be placed in the dishwasher on a gentle cycle for thorough sanitization. A modern straw lid requires similar attention to its crevices to prevent trapped residue buildup.
Pour the mixture into your bottle and give it a vigorous shake. Let it sit for 15 to 30 minutes for mild smells or up to an hour for more stubborn odors. The alkalinity of baking soda breaks down odor-causing compounds directly, reducing flavor transfer between different drinks. After soaking, rinse the bottle thoroughly to remove any residue and air-dry with the cap off to prevent musty smells. If odors persist, repeat the process or let it sit overnight to tackle more persistent protein residues. For bottles made of silicone ice trays, opting for food-grade silicone trays instead can help avoid unwanted chemical leaching.

A HOUSEHOLD CLASSIC: This 2.7 lb resealable bag of ARM & HAMMER Baking Soda unlocks 100+ uses across your home—from kitchens and laundry rooms to crafting tables and beyond

America's #1 trusted Baking Soda brand

16 ounce package
When Vinegar Works Better for Stubborn Smells
Vinegar is more effective than baking soda for stubborn smells caused by protein residue or biofilm buildup. The acetic acid in white vinegar breaks down mineralized protein stuck to plastic surfaces. It also targets bacterial biofilm, the slimy layer where odor-causing bacteria thrive. Research shows 5% acetic acid can reduce biofilm bacteria by about 96% within 20 minutes. To clean your shaker bottle, mix equal parts white vinegar and warm water and soak it for 2 to 4 hours. For tougher cases, soaking overnight allows vinegar to penetrate deep-set residues. After soaking, use a bottle brush to scrub the base and inner walls thoroughly. Achieving similar results with a blender requires using a layered smoothie technique to ensure even contact with cleaning solution. Rinse well to eliminate any lingering vinegar scent and avoid replacing this with more odors. For an even deeper clean, consider using a specialized cleaning cycle on a nut milk maker designed to break down stubborn residues. This method addresses the issue of residual dirt and bacteria which can cause unpleasant smells. Ensuring the lid seals tightly during soaking prevents leaks, just as proper lid alignment is key for safe blender use.

One 16-fluid-ounce bottle of Distilled White Vinegar

VERSATILE PANTRY STAPLE: Perfect for cooking, pickling, marinating, and enhancing your favorite recipes with a crisp, tangy flavor.
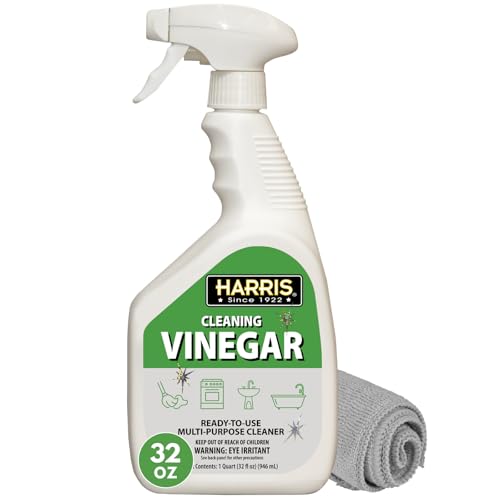
Pre-Mixed & Ready To Use: This effective & easy vinegar spray bottle powerfully cuts through grease & grime—no diluting required
How to Clean the Lid, Gasket, and Threads
To clean the lid, gasket, and threads thoroughly, you need to fully disassemble all parts before cleaning. Start by removing every detachable component from the lid, including spout inserts or flip-tops. If the gasket is removable, pull it out so you can clean both sides. Cleaning only the visible surface often leaves residue hidden in seams, which can harbor odors. Regular cleaning with a gentle, non-abrasive soap helps maintain the silicone’s integrity and prevent staining. Always rinse with warm water immediately after use to prevent residue from hardening.
Wash the gasket separately with warm water to expose both sides. Use a soft brush to scrub the gasket groove thoroughly, ensuring you reach into all the crevices where residue can accumulate. Next, clean the interior of the lid and the threaded areas with warm water and dish soap. Scrub the threads with a small toothbrush to reach narrow valleys and prevent odor buildup. Rinse each part completely to remove any loosened residue.
Once cleaned, air-dry all components fully before reassembling. To prevent moisture from causing new odors, store the lid off the bottle while drying. Only reinstall the gasket once it is completely dry to avoid trapping moisture that could promote odor or mold growth. This thorough approach ensures the same level of completeness as disassembling every part for a colander light fixture.

POWERFUL CLEANING - Flexible silicone bristles reach deep into tight spaces to scrub away residue from water bottles, tumblers, shakers, and mixers without scratching surfaces. Enjoy effortless deep cleaning every time!

Safe and durable to use: the silicone rubber seal gaskets are made of silicone rubber, BPA-free and odorless, scald-proof and heat insulated, durable enough for a long time use

FOOD-GRADE SILICONE: FERRODAY swing top bottle gaskets are made of food-safe silicone, the flexible bottle cap gasket won't deform or crack in regular use.
Do You Need Soap or Just a Deodorizing Soak?
Soap is essential before using a deodorizing soak. Odor issues mainly stem from residue and biofilm, not just scent. Soap effectively removes these sources through scrubbing with warm water, preventing leftover proteins from tainting your next shake and damaging seals or plastics over time. A deodorizing soak with baking soda or vinegar can follow, but only after the bottle is visibly clean. Skipping the soap weakens odor control and risks material degradation. A cocktail strainer is not used for cleaning shaker bottles. For long-term odor prevention, choosing a shaker with a durable handle improves grip during vigorous cleaning, much like the convenience of top-rated Stanley tumblers with handles. Proper drying techniques, such as storing straws in a ventilated container, help prevent moisture buildup that leads to lingering smells.

TARGETS MILK & FORMULA BUILDUP: Specially formulated to break down stubborn fat, protein, and carbohydrate residue left behind by breast milk and formula, leaving baby bottles and dishes truly clean

Bottle cleaning brushes with multiple usage includes 7.9-12.5 inches straw tube cleaning lab brushes, 16 inches long handle beer bottle brush, 14 inches sports water bottle brush, 10 inches multifunction sponge brush and 4.3 inches spout cleaning brush; You can hang them on hook for drying and storage.

ONE SCOTCH-BRITE SCRUBBER: This pack includes 1 Scotch-Brite Bottle Scrubber
What’s the Quickest Soak That Actually Works?
Fill your shaker bottle with equal parts white vinegar and warm water, then fully disassemble the lid, gasket, and mixing ball. Let everything soak for 15 to 30 minutes. The warm water helps loosen stubborn residue, while the vinegar absorbs odors effectively in a short time. After soaking, rinse everything thoroughly to remove any vinegar smell. Scrub the mouthpiece and cap afterward to ensure all gunk is gone. Allow the parts to air-dry completely with the cap off. This quick soak is most effective when all hidden residue has already been removed through scrubbing and disassembly. For a deep clean, you can also use a high-powered blending routine similar to how a top home frappe machine handles thick mixtures. To further break down trapped residue, you can spin the disassembled parts in your Farberware salad spinner at a high speed after soaking. If you lack a vinegar soak, agitating the parts with a steady manual whisk can mimic the effect of a traditional blender blade. For most odors, this method provides a fast and efficient solution.
When the Smell Won’t Go Away: Repeat or Try Stronger Cleaners
If a single soak doesn’t fully eliminate the smell, repeat the cleaning process. Odor-causing residues often hide in seams, threads, caps, and gaskets, so disassemble your bottle completely before soaking. A second baking soda soak can usually remove stubborn residue buildup that survived the first time. For particularly tenacious residues, adopting small habits like disassembling and rinsing your bottle immediately after each use can prevent odors from setting in. Be sure to rinse thoroughly between each attempt to avoid mixing cleaning agents or leaving residue. For heavy orange pulp residue, a high-speed centrifugal juicer can easily break down tough fibers that stain plastic.
If repetition still doesn’t work, escalate to a vinegar soak. Mix equal parts white vinegar and warm water, then let the parts soak for several hours or overnight for best results. Scrub all components to dislodge odor-causing buildup and rinse well afterward to eliminate any lingering vinegar scent.
For odors that come back quickly, consider switching to enzyme cleaners. These break down organic residues that feed recurring smells. Follow label instructions for contact time and pay special attention to threads, lids, and gasket channels. If deep cleaning with these methods fails after two rounds, replacing the bottle may be your best option, especially if scratches or porous plastic are trapping odors permanently.

PLANT BASED CLEANER: Bac-Out uses a plant-based, eco-friendly solution with no artificial fragrances or dyes. Our products never contain phosphates, chlorine, ammonia, or brighteners.

Trusted Pet Enzyme Cleaner Since 1989: Introduced in 1989, Our Mister Max Anti-Icky-Poo is a proven pet enzyme urine cleaner that removes tough odors from dog and cat urine and feces.

Certified Gentle & Safe Pet Carpet Cleaner Solution: Chlorine free, color safe, no hazardous propellants or residue; safe to use around pets and children; certified safe for all carpets with a Seal of Approval by the Carpet and Rug Institute (CRI)
How to Dry and Store Your Shaker So Odors Don’t Return
Fully air-dry every component of your shaker—lid, gasket, and mixing insert—before reassembling it. Any residual moisture can invite lingering odors, so wipe visible water with a towel and leave all parts open and separated to allow proper circulation. Never seal the lid on while the parts are still damp.
Material considerations are important: plastic and silicone parts tend to trap moisture in crevices, so pay special attention to dry these areas thoroughly. When storing your shaker, choose a dry and ventilated spot—avoid humid cabinets or enclosed spaces. Keep the bottle uncapped and place it upside-down on a slotted rack to encourage airflow. Never store damp parts together, as this can promote mold growth. After each use, rinse and empty your shaker promptly, then disassemble for thorough drying to prevent moisture buildup and odors from returning.
How Plastic Bottles Trap Odors (and What to Do About It)
Plastic bottles trap odors because their porous structure acts like a sponge. Microscopic scratches from repeated use and exposure to heat create tiny crevices that hold odor molecules. Residue from leftover proteins, fats, and sugars feeds bacterial growth, forming a biofilm that clings to these scratches. A simple rinse doesn’t remove this buildup, so odors persist. Caps, silicone seals, and threaded lids also hide residue, requiring you to disassemble and scrub these parts separately. To eliminate trapped odors, you can use baking soda or white vinegar mixed with warm water to break down residue and neutralize smells. For stubborn cases, hydrogen peroxide or denture tablets can be effective. Keep in mind, the smell isn’t just on the surface; it’s embedded in the porous material, so targeting the porosity with these methods is key to banishing odors permanently.