Ever wonder how to make a perfectly smooth and creamy smoothie in your Ninja blender? The key is layering ingredients just right to ensure everything blends smoothly and evenly.
With a simple technique, you’ll get that delicious, well-blended drink every time. Keep reading to learn the easy steps for achieving the best smoothie consistency.
Why Ingredient Order Matters in a Ninja Blender
Layer ingredients in your Ninja Blender from liquids to frozen items to ensure optimal blending. Start with liquids at the bottom to create a smooth base and facilitate vortex formation. Next, add powders and sticky add-ins like nut butters or honey, which need to disperse evenly early on to prevent clumping. Follow with greens, such as spinach or kale, which break down more efficiently when surrounded by liquids and powders. Finally, place frozen fruit or ice on top. This placement ensures dense, icy ingredients are pulled into the blades by the vortex, resulting in a smoother texture and more consistent blend. Proper layering not only enhances blending performance but also helps preserve ingredient freshness by reducing blending time. For a reliable option, consider a 40 oz tumbler with handle for serving your smoothie. To avoid lingering odours and mould, quickly rinse the sifter after each use, as recommended for cleaning flour sifters. After blending, pour the smoothie into a durable 32 oz cup with a lid and straw to keep your drink cold and convenient for on-the-go sipping.
Pour Your Liquid Base First (3/4 to 1 Cup)
Start by filling your Ninja blender with ¾ to 1 cup of liquid base. This amount enables the blades to move smoothly and prevents jamming. Use this range based on your fruit pairing and desired texture—¾ cup for a thicker smoothie or 1 cup for a more drinkable consistency. Placing the liquid first creates a whirlpool effect, pulling heavier ingredients down toward the blades. Water, milk, almond milk, or coconut water all work well. Avoid starting with less than 6 ounces, as dry ingredients can stick around the blades and hinder circulation. If you include frozen fruit or ice, this step is essential for smooth blending. You can always add more liquid later if the mixture turns out too thick.
Layer in Soft Ingredients Like Yogurt or Banana
Placing soft ingredients like yogurt or banana slices at this stage is essential for smooth blending. These ingredients sit low near the blade zone, helping the blades catch and circulate the mixture efficiently. Banana adds natural sweetness and creates a thicker texture, while yogurt enhances creaminess. This soft layer acts as a lubricant, accelerating the vortex formation and preventing dry pockets from forming. Be cautious not to add too much—an overload of banana or yogurt can slow down or stall the blending process. Achieving a balanced ratio ensures your smoothie moves smoothly without clumps, creating a consistent, creamy blend. By layering these soft ingredients now, you establish a bridge between the liquid base and denser elements, promoting uniform consistency throughout. For a refined serving presentation, consider pairing your smoothie with a reusable glass straw with charms for stylish sipping. Using a high-powered juicer machine for oranges can also streamline the preparation of fresh juice for your smoothie base. A spiralizer blade works on a similar principle of efficient rotation to evenly process ingredients.
Add Frozen Fruit or Ice Last for Better Blending
Adding frozen fruit and ice last ensures optimal blending. Placing frozen fruit on top of liquids creates a vortex that efficiently pulls the heavy pieces downward, preventing them from blocking the blades. If you add frozen fruit too early, it can jam the blades or cause cavitation, especially in compact Ninja blenders. To incorporate ice smoothly, pulse small amounts through the lid opening, which allows you to control the drink’s thickness and chill. Gradually loading frozen ingredients prevents motor strain and maintains a consistent mixture. Start on a low setting and increase the speed as the blend progresses. If the blend stalls, add frozen fruit in small batches rather than all at once. This loading order consistently produces a smoother, better-textured smoothie every time. For a similar cold, smooth result, consider using Blue Bottle cold brew as a liquid base for added flavor. Keeping your straw lid clean prevents residue buildup that can affect the lid’s seal and nozzle function. For best results, choose an immersion blender that offers strong motor performance to handle frozen ingredients without strain.
How Much Liquid and Fruit for a Single Ninja Smoothie
Start with 1 cup of liquid and 2 cups of fruit for a single Ninja smoothie. This ratio ensures your smoothie has a drinkable consistency without overfilling your 24-ounce cup. For a thicker texture, especially with soft, fresh fruit, reduce the liquid to about ½ cup. If you’re using mostly frozen fruit, stick closer to 1 cup of liquid to keep the blades moving smoothly. Feel free to experiment with different liquids like unsweetened almond milk or coconut water instead of traditional milk or juice. Your fruit can be fresh or frozen—just adjust the liquid amount accordingly. Keep the total solids between 2 and 3 cups to stay below the cup’s fill line, which helps ensure proper circulation and blending. For a smoothie that’s ready to serve, you can strain overripe seeds by pouring it through a colander to remove unwanted pulp or fibrous bits. Using a silicone ice tray can help freeze leftover smoothie into portioned cubes for later use without chemical concerns. With these guidelines, you’ll achieve the perfect texture every time. For those who prefer a blender with a personal cup attachment, a GE blender with personal cup offers similar convenience and portability for single-serve recipes.

LEAKPROOF FLIP CAP* DESIGN: 100% LeakProof Flip Cap is your new go-to for hiking, school, work, the gym, or in your bag without worry when in the locked position

POWERFUL MOTOR: Blend, crush and more in this powerhouse 1100-watt blender.

MORE POWERFUL MOTOR: The Ninja Professional Plus Blender with Auto-iQ features a new modern design and a more powerful motor than Ninja's original Professional Blender. (Versus BL621, based on operating wattage).
Blend for 30 to 60 Seconds on the Smoothie Preset
Once all your ingredients are in the container, load it onto the motor base and select the Smoothie preset. The blender will automatically run for 30 to 60 seconds, using a combination of pulsing and variable speeds to break down fruits and liquids efficiently. It’s best to let the cycle complete fully, as the final seconds help refine the texture and emulsify everything into a smooth, uniform drink. A high-speed blender achieves this by rotating its blades at thousands of RPM to create a powerful vortex that pulls ingredients down toward the blades. The preset starts and stops on its own, so you don’t need to time it. If you’re using ingredients like frozen fruit instead of fresh, choosing the longer end of the cycle can help ensure a thoroughly blended result. After blending, pour your smoothie into a portable container such as a mini tumbler with straw for convenient on-the-go drinking. Avoid stopping the blender early, as it may leave chunks or uneven textures. Always check that the lid is securely engaged before starting to prevent spills and protect your blender’s motor. If your smoothie still feels too thick or chunky after the cycle, run it for a few more seconds rather than restarting a longer blend to avoid overheating the motor. For best results, avoid using a slow oscillating motion as suggested for manual salad spinners, since the blender relies on high-speed preset cycles instead of gentle rotation.

INCREASED MOTOR POWER: The Ninja Professional Plus features a new modern design and a more powerful motor than Ninja's original Professional Blender (1400W vs 1000W of BL610)

TOTAL TEXTURE CONTROL: Built-in Twist Tamper + high-speed blades to power through tough ingredients with 1600 Peak-Watt Power for no stalling, no stirring, no shaking

POWERFUL BLENDING: The intuitive 900-peak-watt push-to-blend motor base powers through everything inside the cup to give you the best of Ninja blending.
Fix a Smoothie That’s Too Thick or Thin
If your smoothie is too thick, add a small amount of extra liquid—starting with the original base like milk or juice—and blend briefly until it reaches a pourable consistency. This approach helps preserve your flavor pairing. Water can be used as well, but it tends to dilute the taste more than milk or coconut milk. Use a tamper or scrape down the sides of the blender to restart blending before over-thinning the smoothie. For an even smoother result, you can first strain ingredients through a fine mesh sieve to catch any unbroken fibers or seeds.
If your smoothie is too thin, incorporate frozen fruit gradually. A banana works well to thicken without disrupting the flavor pairing. Adding a few ice cubes can also help, but too many may weaken the flavor. For ingredient substitutions, consider Greek yogurt for added creaminess or a tablespoon of chia seeds, which absorb excess liquid. Be careful not to add too much at once, or you may stall the blender. To prevent these issues in future batches, start with less liquid—you can always add more later. Adjusting your ingredient ratio early on helps avoid thickening or thinning problems altogether. You can also use a wire whisk or fork as a manual substitute to incorporate air and break up clumps in any dry ingredients you might be adding. For long-term storage, using sealed glass bottles can help maintain freshness and prevent flavor contamination.

Thick and creamy Chobani Greek Yogurt


High-protein Chobani Greek Yogurt drink
Boost Flavor or Nutrition Without Ruining the Blend
Once you’ve achieved the right thickness, you can safely enhance your smoothie with extra flavor or nutrition without disrupting the blend. For flavor, start with small additions like a drizzle of honey or a sprinkle of cinnamon, then taste-test before adding more—flavor balance is essential. Citrus juice or pineapple can brighten the taste without making the smoothie heaviness. To boost nutrition, consider ingredient compatibility: Greek yogurt and protein powder blend smoothly when you layer liquids first, followed by soft ingredients and greens, then frozen items. Spinach dissolves easily, and frozen cauliflower adds body without overwhelming flavor. Use modest amounts of chia or flaxseed to avoid gumminess, and avocado provides creaminess without a strong taste. Always layer your ingredients thoughtfully: liquids first, then soft ingredients, followed by greens, and finally frozen items. Overloading with thick add-ins can ruin the texture, so measure portions carefully. Blending programs that incorporate these boosts evenly will keep your smoothie silky and balanced every time.
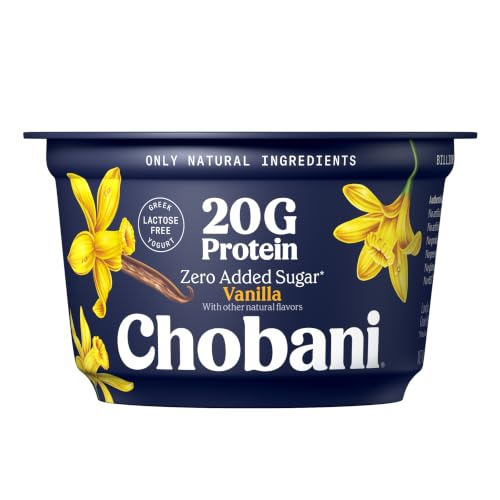
20 grams of protein

All natural ingredients

Stronger Makes Everything Better: Four 5.3 oz cups of Oikos Pro Mixed Berry Yogurt-Cultured Ultra-Filtered Milk Product packed with B vitamins (B2, B6, B12) which are used by muscles to support energy production
Clean Your Ninja Cup in Seconds After Blending
To clean your Ninja cup quickly after blending, rinse it immediately to prevent residue from hardening. First, pour out any remaining smoothie and fill the cup with warm water and a drop of mild dish soap. Secure the lid tightly, then blend briefly—this step loosens the smoothie film instantly. After blending, remove the lid and rinse the cup thoroughly under running water until all soap is washed away. Place the cup upside down to air-dry. For a deeper clean, you can also soak the cup in warm soapy water to help dislodge stubborn residue. Avoid using abrasive scrubbers on the durable plastic, as they can scratch the surface. Instead, use a soft sponge to clean the bottom corners where gunk may collect. Do not touch the blades directly; opt for a handled brush to clean around them safely. Make sure to clean the lid and gasket, as debris can get trapped in crevices. Parts marked as dishwasher safe should be placed on the top rack, but always check your specific model markings first. Always unplug the motor base before removing any parts to ensure safety. Rinsing right after each use helps prevent stains and odors, keeping your cup fresh and ready for the next blend. The modern lemon squeezer evolved from early hand-operated designs that relied on simple mechanical pressure.

【2-in-1 Blender & Deep Cup Cleaning Brush】 Integrates a regular cup brush and an interchangeable gap brush, usable together or separately. The heavy-duty large brush effortlessly handles blenders, juicers, meat grinders, vegetable choppers, and kettles; while the ultra-flexible tiny brush safely targets baby bottles, cups, and crevices. One versatile tool completely replaces multiple kitchen brushes, saving both your budget and storage.

✅【Deep Clean for Every Personal & Portable Blender】From protein shake blenders to travel-size smoothie machines, this 7-piece kit deep cleans cups, blades, lids, and gaskets with precision. Compatible with Ninja, Magic Bullet, and more.

【 3 in 1 Cleaning Brush】3 in 1 bottle brush with a hook remover, stranded slit brush and stiff bristle corner brush, makes easier to clean coffe cups or mechine, tea cups, milk bottles, ice grids, molds, peelers, etc.