Wondering how a Ninja Slushie Machine transforms liquids into frozen treats?
The process involves pouring a pre-mixed liquid with at least 4.5% sugar into the machine, then securing it in place.
Inside, advanced cooling and a rotating auger work together to create smooth, icy slush without needing to add ice.
The rest is just selecting your preferred setting and waiting for it to be ready.
Keep reading to learn how it all comes together.
How the Ninja Slushie Machine Works
To operate the Ninja Slushie Machine, start by pouring your pre-mixed liquid into the vessel up to the designated fill lines; do not add solid objects directly into the vessel. Then, secure the vessel onto a flat, stable surface. Choose one of the five preset modes: Slush, Spiked Slush, Frappé, Milkshake, or Frozen Juice. You can adjust the thickness with control buttons—higher settings produce a firmer, more frozen texture, while lower ones yield a softer consistency. For best results, apply consistent speed and motion when handling the vessel to ensure even mixing, similar to the manual rotation technique used in a Farberware salad spinner. This sifting-like action helps break up clumps and create a smooth texture in frozen drinks, much like a flour sifter aerates dry ingredients for baking.
The machine uses RapidChill Technology, which cools a metal cylinder from inside. An integrated auger continuously rotates the liquid, preventing the formation of ice blocks. Instead, it creates smooth, consistent crystals for a better texture. The entire process typically takes between 15 and 60 minutes, with most batches ready in 25 to 30 minutes when the machine beeps to signal completion. Portable and durable, the Ninja Slushie Machine can be easily moved between countertops. Once ready, you dispense the frozen treat through the pour spout, either as a spoonable or drinkable texture. For optimal results with alcoholic recipes, select the spiked slush preset.
Why the Machine Needs No Ice
The Ninja SLUSHi’s RapidChill technology freezes your drink directly from liquid, so you don’t need ice at all. Unlike slush machines that churn ice cubes into your beverage, this method ensures your drink stays concentrated and flavorful. The internal cooling cylinder freezes the liquid from the inside out, creating fine ice crystals that are scraped from the chilled surface by an internal auger. This process eliminates the need to crush, store, or dispose of ice, making cleanup easier. Because no ice melts into the drink, there is no dilution of flavor or sweetness, so every sip remains true to your original ingredients. You can pour in juice, soda, or cocktails, confident that your beverage will maintain a consistent texture and rich taste from start to finish. Understanding how slushie machines typically work helps clarify why this approach is different from commercial units that may require pre-chilled ingredients or ice. This direct-freeze approach simplifies ingredient preparation and guarantees a pure, undiluted drinking experience every time. The machine is suitable for various liquids like wine, coffee, soda, juice, and chocolate milk, offering a versatile frozen drink option for any occasion. For an even more refreshing experience, try using cold brew concentrate as your base liquid to achieve a smooth, rich flavor without any dilution. For those seeking portability, a 40 oz tumbler with handle is an excellent choice for enjoying your frozen beverage on the go.
Step-by-Step: Making Slush From Start to Finish
Once your machine is set up and stable, making a slush involves a simple process. Start by pouring in your pre-mixed liquid fill. Keep in mind that the machine only handles liquids, so ensure your flavor combinations are fully prepared before pouring. You can also experiment with ingredient substitutions, such as using a sugar substitute, to adjust the freezing point and achieve the desired texture. The liquid must contain at least 4.5% sugar to freeze properly and achieve the slushy texture. Unlike a smoothie blender, this machine relies on precise sugar content rather than ice or frozen fruit to create the perfect slushy texture. Applying consistent pressure while stirring the mixture helps ensure even cooling and prevents ice crystals from forming.
After securing the vessel, select the Slush program on the machine. The machine will then take over and rapidly cool the liquid without needing ice. Keep an eye on the consistency as it freezes, and monitor until it reaches your preferred thickness. When the machine emits a beep indicating it’s ready, pull the handle to serve your homemade slush. To ensure a smooth result, avoid pulpy or fibrous mixtures, as these can clog the machine’s internal juicing components and hinder the freezing process.

NO ICE NEEDED: RapidChill Technology is our innovative two-part system that spins an auger around a cooling cylinder to freeze liquid evenly and maintain optimal temperature for perfect icy treats.
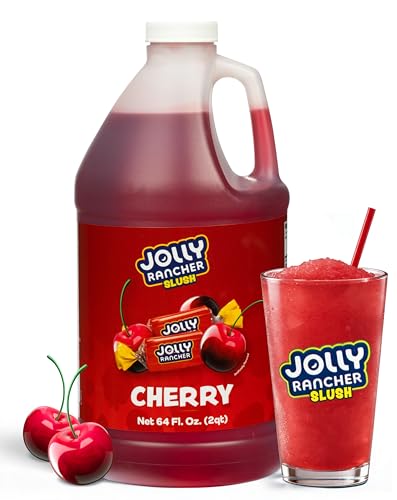
ALL THE HUGE FRUIT FLAVOR YOU LOVE: Bold, tangy Cherry slushie syrup delivers the unmistakable slushie mix flavor you know and love. It’s a flavor-packed slushie experience with huge fruit flavor in every icy serving.
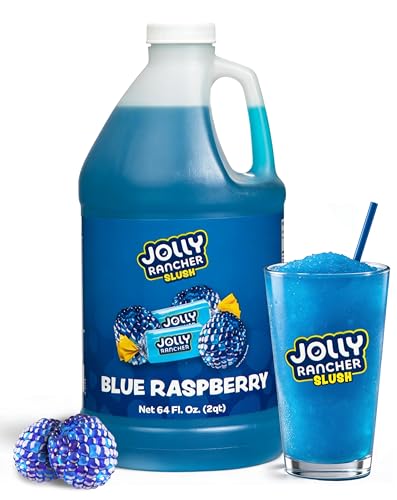
ALL THE HUGE FRUIT FLAVOR YOU LOVE: Bold, tangy Blue Raspberry slushie syrup delivers the unmistakable slushie mix flavor you know and love. It’s a flavor-packed slushie experience with huge fruit flavor in every icy serving.
Best Slush Programs for Juice, Coffee, and Cocktails
The Ninja Slushie machine has four distinct programs because each drink category freezes differently. Each preset is optimized for the specific texture and consistency of different beverages.
For juice-forward drinks such as mango or apple cider, select Frozen Juice. This setting is gentle enough to handle lighter liquids, creating a smooth, drinkable slush. Flavor combinations like cranberry-orange work perfectly here, and ingredient substitutions like sugar substitutes are fine as long as there’s enough sweetness to achieve the desired texture. To achieve a smoother slush with juice, you can slightly reduce sugar to speed up freezing, as lower sugar improves sipability. For the best results with citrus, consider using a commercial orange juicer for freshly squeezed juice.
Standard sweet drinks like lemonade, soda, and sports drinks should be made using the Slush preset. It provides a classic frozen texture that’s syrup-forward, ensuring a refreshing and consistent slush every time.
For alcoholic beverages like margaritas, choose Spiked Slush. Alcohol’s lower freezing point means the machine adjusts chilling and agitation accordingly, resulting in a bar-style cocktail with the right consistency.
Coffee drinks are best prepared with the Frappe setting. This preset is designed for creamy, café-style results with sweetened coffee, milk, or cream. You can fine-tune the thickness afterward by adjusting the temperature controls to suit your preference.


ALL THE HUGE FRUIT FLAVOR YOU LOVE: Bold, tangy Watermelon slushie syrup delivers the unmistakable slushie mix flavor you know and love. It’s a flavor-packed slushie experience with huge fruit flavor in every icy serving.
How Long Does Slush Actually Take to Make?
Making a slush typically takes between 15 and 45 minutes, depending on several factors. The starting temperature and batch size play a significant role. If you pre-chill your liquid, you’ll cut down on wait time. Larger batches require more cooling time, which extends the process. For example, a machine set to a lower temperature can reduce overall freezing time. Sugar content can also speed things up; drinks with more sugar tend to freeze faster. For example, a room-temperature cola might take around 35 minutes to reach the right consistency, while a larger cider batch could take up to an hour. Smaller, colder, nonalcoholic drinks usually freeze more quickly. You’ll recognize when your slush is ready because the machine will signal it, not just because of noise. Keep in mind that different flavors may behave differently, so don’t worry if your first attempt takes longer than expected. Similarly, using a high-powered immersion blender in a Dutch oven is safe and effective for blending hot soups directly in the pot.
What Happens If Your Drink Has Too Little Sugar?
If your drink contains less than 4% sugar by weight—or roughly 5 grams per 100 milliliters—the Ninja Slushie machine will not operate properly. This threshold is essential because sugar influences the freezing point of the mixture. Without enough dissolved sugar, the liquid freezes too quickly and solidifies into ice rather than forming a smooth, spoonable slush. The machine relies on a partially frozen zone to maintain the right texture; when sugar levels are too low, it cannot sustain this zone. Even if your drink tastes sweet, if it’s diluted or sweetened with sugar-free alternatives, the machine will trigger an alert. To fix this, add real sugar—such as simple syrup, juice concentrate, or honey—and mix thoroughly before restarting. Maintaining at least this minimum sugar level ensures your drink can achieve the desired slushy consistency without becoming icy or rock-hard. For a convenient container, consider using amber glass dropper bottles to store your simple syrup or juice concentrate. Similarly, natural sweeteners from fruit can help you reach the necessary sugar content without needing a blender for the base mixture.
Can You Slush Coffee, Cocktails, or Milk Drinks?
You can make coffee, cocktails, and milk drinks in a Ninja Slushie machine, but you’ll need to adapt your approach for the best results. For coffee, start with chilled espresso or brewed coffee, then use the Frappé or Milkshake preset. Adding enough sugar is essential to ensure it freezes properly; mixing espresso with milk, vanilla, or caramel creates smoother flavor pairings. For cocktails, select the Spiked Slush preset and balance alcohol with chilled coffee or juice. Keep alcohol content within the machine’s capacity, as too much prevents freezing. For milk-based drinks, opt for the Milkshake preset with chilled milk, half-and-half, or cream. Enhance flavor with vanilla, chocolate, or fruit, and consider adding protein powder for a thicker, creamier texture. Always pre-chill all liquids and fully dissolve sweeteners beforehand to avoid icy clumps and achieve smooth consistency. If you need a way to keep your finished drink handy, consider building a DIY tumbler cup holder to secure your cup between batches.
How to Adjust Slush Thickness and Texture
Adjust the temperature controls on your machine to fine-tune the slush’s thickness and texture. The default setting provides a balanced start, but you can make small, one-click adjustments—turning colder (clockwise or tap up) for a thicker, spoonable consistency, or warmer for a thinner, sippable texture. Always wait 5 to 10 minutes after adjusting to allow the temperature change to take full effect; rapid changes can ruin your batch. Common texture problems, such as an overly icy or separated mix, can often be fixed by blending the mixture briefly to reincorporate ingredients. Understanding the freezing point of the liquid helps you avoid these issues from the start. For best results, always pre-chill your ingredients before starting to improve consistency and reduce strain on the machine.
Your recipe’s ingredients influence the ideal temperature as well. Higher sugar or alcohol content requires colder settings to freeze properly, while lower sugar ingredients freeze more easily at warmer temperatures. Flavorings like syrups and juices also alter freezing points, so expect to adjust accordingly. Small tweaks help you maintain the perfect semi-frozen texture, ensuring your slush isn’t too icy or too runny. If the mixture is too thin, adjust the temperature colder and wait 5 to 10 minutes for the change to take effect.

#1 SMART FROZEN DRINK MAKER: Ninja pioneered the smart frozen drink maker category and SLUSHI MAX XXL is the smartest, fastest, thickest, and most powerful* consumer slush machine on the Amazon market. (*Based on max alcohol content, slush time)

2 SLUSHi MACHINES IN 1: Slush and serve two different drinks at once or twist them together for endless combinations.
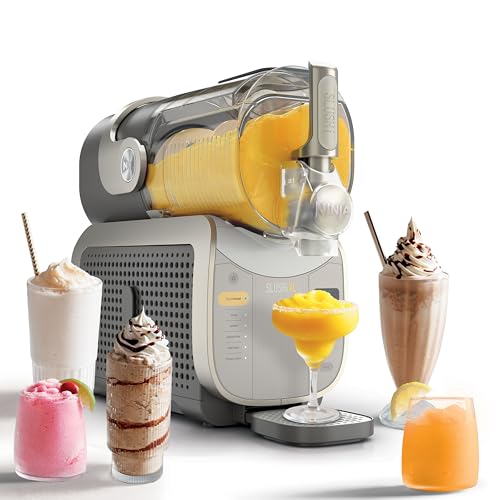
SMARTER SLUSHING WITH ZERO GUESSWORK*: NEW SlushAssist Technology senses ingredients and auto-adjusts temperature for perfect slush every time. *Compared to Ninja SLUSHi FS300.
Common Slush Mistakes and How to Fix Them
Incorrect machine setup is a common slush-making mistake. If the vessel is loose or the preset isn’t right, the cycle won’t run properly. Always double-check that the vessel is securely in place before starting. Verify you are using the correct preset for the type of slush you’re making, as this ensures proper freezing and blending. Poor setup can lead to inconsistent texture or incomplete freezing, so taking a moment to confirm these details saves time and prevents waste. For best results, your chilled cup should use a tumbler straw oriented with its specific cut tip facing forward to ensure proper liquid flow.

Perfect Fit Replacement: This spout replacement is designed for Ninja slushie and frozen drink machines FS300/FS301C/FS301300 models. Please note that our product is not sponsored or endorsed by, or affiliated with the brands it fits, including Ninja.

【COMPATIBIE MODELS】- Our lid top replacement ONLY works with Ninja Slushie. clear vessels, including: FS301, FS299, FS301C, CL301A, CO503F and CCO305F. Please check your machine’s model before buying. More details, please refer to image No.3. We DON’T claim our lid replacement is original.

Compatibility: Our 18oz Ninja Blast accessories replacement is suitable for Ninja Blast BC100, BC100NV, BC100EM, BC100PR, BC100CR, BC100BK, BC100WH, BC151, BC151BK, BC151WH, BC151NV, BC151PR, BC151CR, BC151EM, BC100C, BC100NVC, BC100EMC, BC100PRC, BC100CRC, BC100BKC, BC100WHC, BC151C, BC151BKC, BC151WHC, BC151NVC, BC151PRC, BC151CRC, BC151EMC, BC151Qx, CL155A, CO155B
How to Clean Your Ninja Slushie Machine
To keep your Ninja slushie machine running smoothly, regular cleaning is essential. Start with a rinse cycle after each use by stopping the program, pressing rinse, adding warm water up to the max fill line, circulating it, and then dispensing it. For a more thorough clean, add 1-2 drops of dish soap to warm water, run the cycle for about a minute, then flush with clean water. Disassemble the removable parts by unlocking the bale handle, removing the vessel, sliding off the auger, and taking out the drip tray and condensation catch. Hand-wash these components with warm, soapy water or place them in the dishwasher—just skip the heated dry cycle. Wipe down the evaporator and motor base with a damp cloth. For best results, always use high-quality ingredients to reduce residue buildup and ensure smoother operation. Stick to this cleaning routine and ensure all parts air-dry completely before storing, which helps prevent sticky residues and odors from building up. You should also slide out the condensation catch separately for cleaning before reassembling the unit. This process is much easier when you avoid overfilling the machine, a common mistake that can lead to messes and reduced efficiency.

Designed for Ninja SLUSHi: Built to tackle the notoriously hard-to-clean narrow crevices of your machine. This dedicated kit effortlessly flushes out sticky syrup from blind spots where odors and mold hide. Tested on 88oz models (FS301, FS299, FS305CO) and made for any SLUSHi with the same crevice
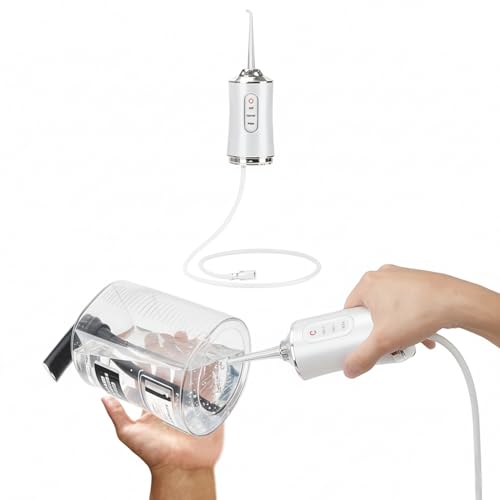
🚀 Plug & Play Tool-Free Cleaning – Designed for Ninja Slushie Machine FS301/FS300, target residue areas with one button, and deep clean in just 30 seconds!

Value Pack: You'll get an ice machine cleaning brush kit that includes 2 extra-long pipe cleaning brushes and 8 crevice cleaning brushes, enough styles to meet your cleaning needs