Wondering if it’s safe to use an immersion blender in a Dutch oven? The good news is, yes, it can be, as long as you choose the right type of cookware and follow some simple techniques.
Enameled cast iron is best for durability, while non-stick surfaces can be damaged by metal blades. Keep reading to learn how to blend hot soups without harming your cookware.
What Damage Can an Immersion Blender Cause in a Dutch Oven?
Immersion blenders can cause three main types of damage to a Dutch oven. First, surface scratches often appear where the blender’s guard contacts the enamel surface repeatedly. These scratches worsen if you don’t vary your blending motion; keeping the blender moving helps prevent lasting marks. A key difference is that enamel requires more careful technique than the stainless steel pots found in many pasta cookers. Second, hard impacts from aggressive plunging can chip the enamel coating, exposing the underlying metal. This damage requires careful cleaning—gentle abrasive pads can polish away superficial scuffs resulting from metal transfer, but they cannot repair deep chips. Finally, over time, the enamel’s finish may weaken and dull, especially if you apply too much pressure during use. It’s important to note that enamel scratches more easily than stainless steel, but metal tools should never be used on it. For best results, you can reference everyday kitchen use tips from the Magic Bullet guide to minimize pressure and maintain the finish. Dull spots on the bottom of the pan usually indicate contact with the blender or utensil, not structural failure. Using the correct blending motion as recommended in the guide can prevent these marks from developing.
Enamel, Ceramic, or Non-Stick: Which Dutch Oven Materials Survive Blending?
Enamel-coated cast iron Dutch ovens are the most durable choice for immersion blending. The porcelain enamel surface withstands careful blending, especially if you use a nylon guard to protect the finish. To minimize damage, keep the blender blade submerged and avoid scratching the sides or bottom with hard presses or scrapes. Ceramic interiors tolerate blending better than non-stick surfaces but still require lower speeds and gentle motions to prevent visible wear from direct pressure. Non-stick coatings are the most vulnerable because metal contact can quickly degrade their surface, even with guards in place. Overall, enamel offers the best balance of durability and safety for blending tasks, making it the practical choice if you want a long-lasting Dutch oven that can handle immersion blending with proper technique. For best results, use a frozen banana for a thicker and creamier milkshake texture when blending, as this minimizes the need for ice. For better results, avoid the common beginner mistake of pressing the blade too hard against the enamel surface, which can cause chips and scratches over time. When choosing bottles for your blended creations, look for sturdy glass bottles that can withstand the pressure of carbonation from kombucha.

Even Heat Distribution Retention: This Umite Chef Dutch oven Made with heavy-duty enameled cast iron, ensures even heat distribution for perfect searing and slow cooking, locking in flavors. thickened walls lock in heat for slow braising, searing, and baking. Unlike thin pots that scorch food, this professional-grade Enameled cast iron potSuperior heat retention after preheating (allow 5-7 mins for even distribution). CRITICAL: Always cool naturally for 45+ mins before cleaning. Thermal shock (hot-to-cold contact) cracks enamel. USE TIP: Preheat 2-3 mins on medium-low only

Even Heat Distribution Retention: This Dutch oven Made with heavy-duty enameled cast iron, ensures even heat distribution for perfect searing and slow cooking, locking in flavors. thickened walls lock in heat for slow braising, searing, and baking. Unlike thin pots that scorch food, this professional-grade Enameled cast iron pot maintains steady temperatures

BREAD BAKER'S DUTCH OVEN, 500°F OVEN-SAFE, SOURDOUGH-READY – one of the highest ratings in its class – delivering the sustained heat that sourdough, artisan bread, and pizza dough demand. Thick cast-iron walls trap and circulate heat like a brick oven, producing bakery-quality crusts at home. The tight-sealing lid features raised self-basting nodes that continuously recirculate steam: a perfect moisture chamber, every single bake.
Why Non-Stick Dutch Ovens and Immersion Blenders Don’t Mix
Using an immersion blender in a non-stick Dutch oven is highly likely to damage the coating. The metal guard and blade housing can easily scratch or gouge the surface. Even if the blades stay fully recessed, the outer bell can still abrade the coating during contact with the pot. Repeated friction from blending causes small scratches to deepen and enlarge, turning minor marks into permanent wear. Over time, these scratches compromise the non-stick properties, making food more likely to stick and the cookware harder to clean. This damage isn’t just cosmetic; it poses safety concerns as well. High-speed blending increases friction and can cause suction, pulling the blender into the bottom of the pot. Once the coating is scratched, flakes can break off and mix into your food, presenting a potential ingestion hazard. Manufacturers consistently warn against using immersion blenders with non-stick cookware. To maintain safety and extend your Dutch oven’s lifespan, it’s best to transfer hot soups or sauces to a stainless steel or other compatible vessel before blending. If you need a reliable lid for your drinkware, look for a cup lid with straw designed to prevent spills. For those who prefer a more portable solution for mixing drinks, consider using a shaker bottle with storage instead. For a superior blending experience, consider models praised for quality and performance in dedicated reviews.

SUPERIOR FUNCTION: Versatile and durable, the Cuisinart 300-watt Smart Stick variable speed hand blender switches from low to high speed quickly

Versatile: Powerful motor blends foods in seconds, from milkshakes to baby food & delicate sauces

STAINLESS STEEL CONSTRUCTION: Made from durable stainless steel for long-lasting use and easy cleaning.
How to Blend in a Dutch Oven Without Scratching the Finish
To blend in a Dutch oven without scratching the finish, keep the immersion blender slightly lifted off the bottom and hold it at a slight angle. This position prevents the blade guard from grinding against the enamel surface. Use a gentle, controlled motion rather than aggressive plunging, starting with short pulses and then blending continuously while moving slowly. A garlic press uses a similar principle of controlled motion to avoid damaging cookware. Choosing a blender with a protected blade guard designed for enameled cast iron reduces direct contact with the surface. Understanding how double-wall insulation works can help you recognize that Dutch ovens retain heat effectively, which is useful when blending hot soups. After blending, inspect the interior for any scuffs; clean those gently with a soft sponge and mild soap. Avoid steel wool, as it can create micro-scratches, and prefer stainless steel or enameled cookware for blending purposes rather than non-stick surfaces. Evaluating the long-term value of a blender includes comparing its overall cleaning effort to that of an emulsion blender.

Even Heat Distribution Retention: This Dutch oven Made with heavy-duty enameled cast iron, ensures even heat distribution for perfect searing and slow cooking, locking in flavors. thickened walls lock in heat for slow braising, searing, and baking. Unlike thin pots that scorch food, this professional-grade Enameled cast iron pot maintains steady temperatures

Crock Pot Artisan Oval Enameled Cast Iron Dutch Oven, 7-Quart, Scarlet Red w/Lid

QUALITY CONSTRUCTION: Our Cast Iron Dutch Oven, covered with chip-resistant porcelain-enamel, delivers superior heat distribution and retention. Ideal for slow cooking, braising, roasting, and more
Is It Safe to Blend Hot Soup Directly in a Dutch Oven?
Blending hot soup directly in a Dutch oven can be safe if you follow proper techniques. First, ensure the soup isn’t boiling violently; it should be hot but only gently bubbling. Reduce the heat to a simmer to prevent splashes and steam bursts that can occur with rapid boiling. Choosing the right tumbler for a perfect sip is unrelated, but safety remains paramount. For instance, ensuring your cold brew is filtered and cooled before canning prevents similar pressure issues. Using an immersion blender in hot soup is safe because the blender motor is designed to handle high temperatures without overheating.
When blending, fully immerse the blender blades into the soup before turning it on. Keep the lid slightly unsealed or hold it tightly to allow steam to escape safely without creating pressure. Use low-speed or pulse settings to maintain control and prevent splattering. Move the blender slowly through the soup, avoiding sudden movements that can create vortexes or spill.
Also, leave adequate room in your Dutch oven to contain foam or bubbles that may form during blending. Always keep the soup below the pot’s maximum capacity. Follow these steps carefully, and you’ll minimize risks while blending hot soup directly in your Dutch oven.
How to Avoid Burns When Blending Hot Soup in a Dutch Oven
To avoid burns when blending hot soup in a Dutch oven, you should lower the heat and let the soup cool slightly before blending. Remove the pot from the stove and wait until the bubbling subsides and the surface isn’t violently boiling. Ensure the immersion blender’s blade is fully submerged before turning it on; this prevents hot liquid from splashing out. Use a tall, deep Dutch oven and avoid overfilling; leave ample headspace for expansion and splattering. Start blending at the lowest speed, gradually increasing as needed, and move the blender slowly to maintain control. Keep your face away from the top of the pot to avoid steam burns, and wear heat-resistant gloves for added safety. Always inspect your immersion blender’s cord and seals regularly to prevent malfunctions. If you notice splashing or sputtering, stop immediately and allow the steam to settle before resuming. Remember to turn off the blender before lifting it out of the soup to prevent hot liquid from spilling. After cleaning, allow the blender shaft to air-dry completely to prevent mould and odour from returning. A stuck lid can help you identify the parts that usually fail if you encounter similar issues with blenders or other kitchen equipment. For optimal safety and performance, ensure your blender has quality motor seals to prevent steam damage and extend its lifespan.

ATTENTION! Heat Resistant Gloves are designed to protect your hands from the burning when a instant touch of the hot iron(no more than 5s), do not hold the iron wand for a long time; Only use for preventing your hands from being burned by the hot styling tools, like curling iron, straightener, clothes steam iron, curling wand, hot-air-brushes; can not be used for holding hot pots ,handling hot food

【Up to 482°F Heat Protection for Quick Hot Item Handling】Our heat resistant gloves feature premium thermostable silicone bumps on both sides. Support instant contact protection up to 250°C/482°F, ideal for short-duration contact with heat sources. Designed for quick pick-up of heated objects instead of prolonged gripping, effectively shield your hands from accidental burns during work.

High Quality Oven Gloves Heat Resistant: Our oven mitts heat resistant baking supplies are crafted from premium quality aramid material. The heat resistant oven gloves are very strong, heat resistant and serve you for longtime.
Should You Blend in Short Bursts or Go Continuous?
Short bursts of 15 to 30 seconds are your best option. They reduce splatter, give you better control, and allow ingredients to settle between passes, resulting in finer texture without creating chaos in the blender. Pulsing in this way also helps prevent motor overheating, which is important for maintaining your equipment. After each burst, pause briefly to assess the mixture before continuing. This rhythm ensures you get smooth results while protecting your blender’s motor. Continuous blending should be reserved for quick finishing passes—ideally no longer than one minute—in deep, stable containers like a Dutch oven. Longer runs can strain lower-power units and lead to uneven blending. For overall equipment safety and better outcomes, stick with pulsing as your default method, saving continuous blends for the final slipstream of smoothness. For those who also enjoy crafting fresh beverages, similar attention to technique applies when using a glass iced tea pitcher with an infuser to ensure optimal flavor extraction without damaging the vessel. Choosing a container with a bamboo lid adds both style and practical sealing for your infuser setup.
How to Position an Immersion Blender in a Dutch Oven to Avoid Suction
To avoid suction when using an immersion blender in a Dutch oven, position the blade carefully. Keep the blade fully submerged in the liquid to prevent air from entering the guard, which can cause the blender to lock onto the bottom. Tilt the blender at a slight angle rather than holding it perfectly vertical; this small adjustment helps food circulate freely and prevents the blade guard from sealing flat against the pot’s base. Avoid pressing straight down; instead, hover the blender just above the bottom surface. Move it gently in side-to-side or circular motions to maintain consistent liquid flow around the blade. If you notice suction forming, tilt the unit to break the seal—do not yank it upward. Maintaining proper blade positioning is key to preventing sticking and splashing during blending.

No More Lumpy Chunks: Equipped with a strength 1100W full copper motor, providing for several times significantly stronger blending and chopping capabilities in seconds to create velvety smooth puree results

Included: 5-Speed Immersion Blender with four-pronged blade base to create ideal textures from whole-food ingredients
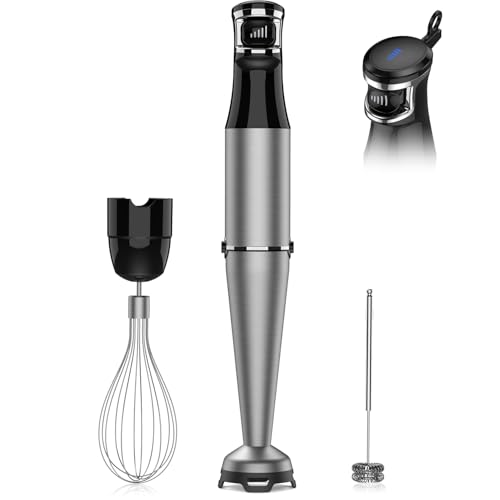
No More Lumpy Chunks: Equipped with a strength 1100W full copper motor, providing for several times significantly stronger blending and chopping capabilities in seconds to create velvety smooth puree results.
The One Rule for Scratch-Free Blending in a Dutch Oven
The single most important rule is to keep the blender head from rubbing against the Dutch oven. Direct contact between the blades and the surface, or scraping with a guard, is the main cause of surface scratches. Although enamel coating is tougher than nonstick, it isn’t completely scratch-proof. Never press the blender against the bottom or drag it along the sides. Holding it still while blending minimizes wear, so keep the blender’s head moving through the food instead of against the cookware. Start with the blender fully submerged to avoid contact with the edge, and use lower speeds to lessen aggressive movements. While protective guards can help, they do not eliminate all risks—metal guards in particular can still cause damage. Lifting the blender while it’s running increases the chance of side scraping and scratching. If your Dutch oven already has chips or rough spots, it becomes even more vulnerable. Following this one rule diligently will keep your Dutch oven surface smooth and scratch-free.