Want to make a milkshake without a blender? It’s simpler than you might think. By softening ice cream and stirring in cold milk with a few easy techniques, you can create a smooth and tasty shake using just common kitchen tools.
In this intro, I’ll show you how to achieve a creamy milkshake without any special equipment so you can enjoy a quick treat anytime. Keep reading for the full, step-by-step method.
The Perfect Ratio for a No-Blender Milkshake
To achieve the perfect no-blender milkshake, use a ratio of about 3 parts ice cream to 1 part milk. Starting with 1½ cups of ice cream and ½ cup of whole milk creates a thick, pourable base. For a creamier, spoonable consistency, reduce the milk to ¼ cup; for a smoother, more drinkable shake, increase the milk to ¾ cup. Keep the milk well-chilled to help maintain density and prevent thinning. Pour the shake into a frosted glass to help it stay thicker longer. Serve with a straw and a long spoon for easy sipping and scooping. To elevate presentation, top with whipped cream or a cherry. Adjust the milk in small increments to avoid making the shake too thin, but always keep the ratio above 2:1 ice cream to milk for best results. A quality shaker bottle with storage can also serve as a convenient mixing and serving vessel for this method. Using a 40 oz tumbler with handle can help you keep the milkshake cold and easy to drink while on the go. Many home cooks find this method simpler than using a blender because it requires no cleanup of blender blades and creates a perfectly smooth texture with just a whisk or fork.

Stainless Steel Construction: Spill-proof shaker bottle made of BPA-free stainless steel for mixing supplements and smoothies.

Sleek design that’s easy to grip
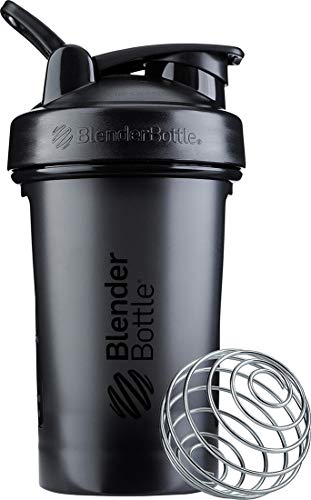
20-ounce capacity (Note: measurement markings only go to 14 ounces)
How to Mash, Stir, and Shake a No-Blender Milkshake Smooth
To achieve a smooth, pourable milkshake without a blender, start by softening your ice cream for 10–15 minutes at room temperature until it yields to a spoon. Then, mash it vigorously with a fork for 30–60 seconds to break down clumps. Next, stir in your milk using wide whisking motions for 1–2 minutes, making sure to scrape the sides of the bowl to incorporate air. This process helps build a light yet thick texture that lasts. Transfer the mixture to a sealed jar and shake it for 45–60 seconds until fully combined and smooth. If you’re using non-dairy milk or other ingredient alternatives, add a splash more to adjust the consistency. Finally, mash any remaining lumps against the jar wall to ensure a smooth, pourable shake free of hard clumps. For an even more efficient mashing step, consider how a citrus reamer is used for different kitchen tasks. Instead of a fork, you can also use a potato masher for quicker and more effective mashing. For an extra flavor boost, consider using blue bottle cold brew as your liquid base instead of plain milk.
15 Mix-Ins and Flavors That Work Without a Blender
You can effectively fold a variety of flavors into a hand-mixed shake without a blender by choosing ingredients that blend easily. Rich chocolate syrup paired with a pinch of salt complements caramel flavors wonderfully. Smooth peanut butter combined with cocoa powder creates a deep, nutty taste that’s satisfying. Frozen fruit, like mashed bananas or strawberries, softens quickly when stirred into the base, ensuring even distribution. To add texture, finely crush cookies such as Oreos, graham crackers, or waffle cone pieces and stir them in. For crunch, sprinkle chopped Reese’s Pieces or Snickers on top. Swirling in marshmallow fluff or chocolate-hazelnut spread adds sweetness without disturbing the shake’s consistency. Use a soft brush to clean residue from your press’s small holes to prevent old garlic from affecting future recipes. Using a straw with a lid ensures easy drinking when you’re enjoying your finished creation. For a festive twist, consider stirring in crushed peppermint candy for a cool, bright flavor that pairs well with chocolate.
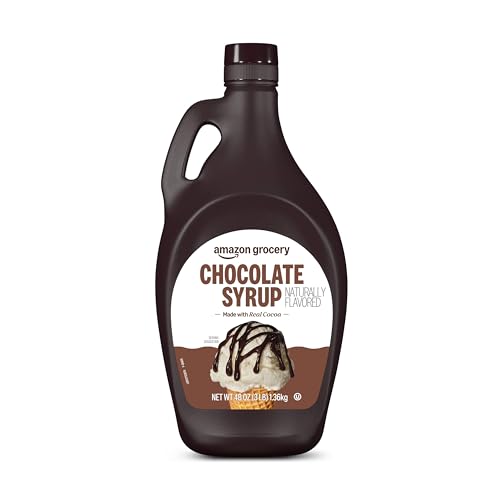
One 48 ounce bottle of chocolate syrup

Organic chocolate syrup

MEGA 30ml DISPENSING – Each pump delivers 30ml (2 tbsp) of syrup – triple the amount of standard syrup pump. Ideal for hershey chocolate milk, sundaes, or coffee. One press = perfect portion. No more pumping 3-4 times.
Simple Tricks to Keep Your No-Blender Milkshake Thick
To keep your no-blender milkshake thick, start with a a high ice-cream-to-milk ratio—three scoops of ice cream to just a quarter cup of whole milk. Keep all ingredients very cold: use ice cream straight from the freezer, chill the milk beforehand, and even pre-freeze your glass. Slightly soften the ice cream, just until it’s malleable, not melted. Add the milk slowly in small splashes rather than all at once to prevent thinning. Using an insulated cup with vacuum insulation prevents heat transfer, maintaining cold temperature and thickness. For an even smoother consistency, you can use an immersion blender as an alternative to a traditional blender. For best results when doing so, make sure to keep the blade fully submerged while blending to avoid splashing. Mix gently and stop as soon as everything is combined to avoid warming the shake. For toppings like fruit or chocolate syrup, swirl them in at the end. Stirring these in too early can add unwanted liquid and compromise the thick texture. These tricks help you achieve a spoonable, thick milkshake without needing a blender. For those who prefer a portable option, choosing a well-sealed tumbler with a straw can also help maintain the shake’s temperature while sipping on the go.

Drinks Cold or Hot: 24 oz Vacuum insulated stainless steel tumbler perfect for an on-the-go coffee, smoothies, water, or anything in between. This stainless steel tumbler is designed to keep drinks hotter and colder for longer.

Double Wall Vacuum Insulated Technology: This tumbler can keep beverages cold for up to 24 hours and keep hot for at least 6 hours

32 OZ INDIGO TUMBLER: The insulated Hydro Flask 32 oz Travel Tumbler cup with easy flow straw is here to hydrate more and refill less. The insulation keeps drinks cold and the durable handle takes it to the next level. This stainless steel tumbler can go anywhere, fitting most cupholders.
Why the Spoon-and-Bowl Method Beats a Blender for Thick Shakes
A spoon-and-bowl method provides better control for thick, spoonable shakes than a blender. It limits air incorporation and prevents heat buildup from motor friction, which can thin your drink. With manual motion, you directly adjust the mixture’s consistency by controlling the speed and intensity of your stirring or whisking. Carefully stopping as soon as ingredients combine keeps a dense, chunky texture intact, avoiding over-aeration that creates foaminess. This method also preserves mix-ins from over-processing, resulting in a rustic, satisfying thickness. Plus, you only need a bowl and spoon—no cords or complicated cleanup—making it straightforward and reliable. For a truly dense, spoonable shake, this approach offers superior control and consistency compared to a blender, much like how a quality salad spinner avoids overworking fragile ingredients. Mastering the right speed or motion of your stirring is key to preventing your shake from thinning out. For those who prefer even thicker results, some home soft serve machines can churn a denser base than a typical hand-mixed shake.