Struggling to chop vegetables quickly and safely? A vegetable chopper can cut prep time significantly, offering uniform pieces in seconds. When used correctly, it makes the process easier and safer, especially if you’re short on time or kitchen space.
Keep reading to learn the simple steps for fast, safe, and effective chopping.
How to Choose a Vegetable Chopper for Your Kitchen?
Matching your vegetable chopper’s capacity to your typical kitchen tasks is essential. For quick garnishes or herb chopping, a unit with about 2 cups of capacity is usually sufficient. If you often prepare larger quantities for family meals, look for models that hold 3 to 4 cups. The capacity determines your batch size, so choose accordingly to avoid needing multiple choppers or ending up with excess leftovers. Considering the blade material is also important; stainless steel blades stay sharp longer, resist rust, and handle firm vegetables like carrots with ease. If you mainly do small jobs, a compact countertop model is enough, saving space and money. Selecting a chopper that matches your volume needs and the toughness of your ingredients helps prevent frustration and ensures efficient prep. For tasks that require creamy textures, you might also consider a blender that can handle both chopping and blending duties. Similarly, if you need to transport dressings or sauces, a shaker bottle with storage offers a convenient all-in-one solution for prepped ingredients on the go. For durable performance when processing tough ingredients, consider features like a stainless steel blade to maintain long-lasting sharpness.
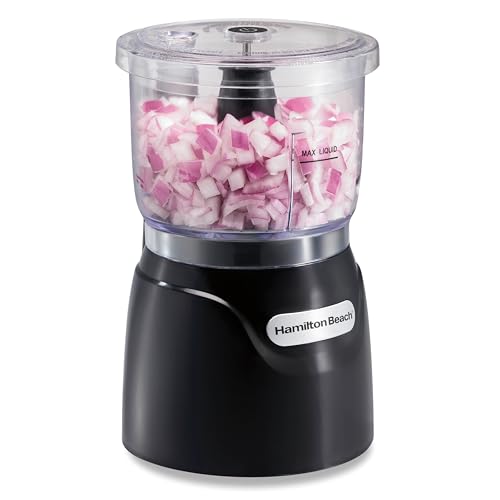
Simply stack and press to chop: The patented stack & press design makes it easy to assemble and use. Simply press the lid to chop and release to stop. Since all you do is stack the lid on top of the bowl, no difficult twist-locking is needed.
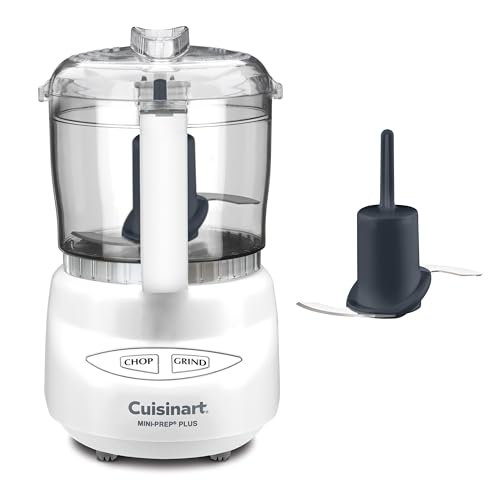
SUPERIOR FUNCTION: The Cuisinart Mini-Prep Plus Food Processor offers an efficient 250-watt motor and patented reversible stainless steel blade to quickly chop herbs, dice vegetables, and grind hard cheese.

SUPERIOR FUNCTION: The Cuisinart Mini-Prep Plus Food Processor offers an efficient 250-watt motor and patented reversible stainless steel blade to quickly chop herbs, dice vegetables, and grind hard cheese
How to Keep Your Fingers Safe Around a Vegetable Chopper’s Blades?
To keep your fingers safe around a vegetable chopper’s blades, always keep them well away from the cutting zone. Use the built-in hand guard or pusher at all times—never improvise with bare fingers. When the pieces become too small to hold safely, stop cutting and switch to the guard instead. Wearing a cut-resistant glove on your holding hand provides extra protection, especially if the pieces are slippery or uneven. Place your chopper on a flat, stable surface to prevent shifting during use. You can also apply the same principle used for making ice cubes without a tray, where alternative methods must keep your hands clear of sharp or moving parts. For the best results with citrus, a juicer machine can handle oranges without requiring you to handle sharp blades directly.
For blade maintenance, handle blades only by their plastic frame to avoid injuries. Clean blades with a brush rather than your bare hands, and always store the chopper with blades covered or retracted to prevent accidental cuts. Following these safety rules keeps your fingers at a safe distance from the sharp blades at all times.
What Size to Cut Vegetables for Your Vegetable Chopper’s Best Results?
Keep your vegetables uniformly sized before chopping to ensure consistent results. Aim for 1-to-2-inch chunks of vegetables such as carrots, peppers, and zucchinis. Smaller pieces help the chopper work more smoothly and prevent uneven cuts. Break larger vegetables like carrots into manageable 1-inch pieces for cleaner, more uniform chopping. Match your cut size to your blade: 1/4 inch for fine garnishes, 3/8 inch for salads and versatility, or 1/2 inch for chunkier textures. Consider your final use—smaller cuts blend better in sauces, while larger chunks stand out in salsas. For storage, pre-cut firm veggies smaller to reduce resistance, but keep softer vegetables uniform to prevent turning mushy. Always align your prep size with your blade geometry for the most consistent, professional results. Just as with paper straws, some products are surprisingly made from non-gluten materials that require careful ingredient verification. After chopping, you can use a salad spinner to quickly dry the pieces for better dressing adhesion. You can also apply manual pressure techniques similar to those used for juicing to help force stubborn vegetable pieces through the chopper.

【Game Changer for Cooking】This 8-Blade Cook Tool & Gadget Sets makes slicing, dicing, and chopping quick and effortless, it’s a time saver and game changer for how you prep food in the kitchen.

Meal Prep MVP - A practical and innovative way to dice, slice, julienne, grate or spiralize your vegetables and fruits. With the Ultimate Chopper/Slicer & Spiralizer, preparing your favorite dishes for your whole family is no longer a chore. Made with premium materials like grade 420 stainless steel blades and food-grade bpa-free materials, it's the perfect tool to make home cooked meals easier and faster.

【Game Changer for Cooking】This 12-Blade Cook Tool & Gadget Sets makes slicing, dicing, and chopping quick and effortless, it’s a time saver and game changer for how you prep food in the kitchen.
How to Load Food Into a Vegetable Chopper Without Jamming?
To avoid jamming your vegetable chopper, load ingredients loosely in small batches. Fill the bowl only up to the designated fill line, leaving visible headspace so the ingredients can move freely around the blades. Make sure all pieces are roughly equal in size; oversized chunks tend to wedge against the blades, causing stalls. Do not press or compress the food by hand—loose packing encourages ingredients to tumble naturally into the cutting zone.
For dense or fibrous items, add them gradually in smaller quantities to prevent blade stalls. If you notice resistance during chopping, stop immediately and redistribute the load. Pat vegetables dry before loading to reduce excess moisture, which can create sticking under the blades and reduce grip. Between batches, empty the bowl if contents start pressing against the sides to maintain smooth operation. Proper storage of produce ensures it stays dry and easier to chop, and using chopper accessories like batch scrapers can help remove stuck pieces without overloading the device. This technique is similar to how lemon squeezer users avoid overfilling the chamber to ensure smooth operation.

Chop Onion in a Breeze: Place onion on stainless steel chevron blade, cover with the top lid and press down with your hands so you can create evenly sized chopped onions. You won't have to worry about the onions making you weep anymore because the chopped onions will fall right into the transparent container bowl below.
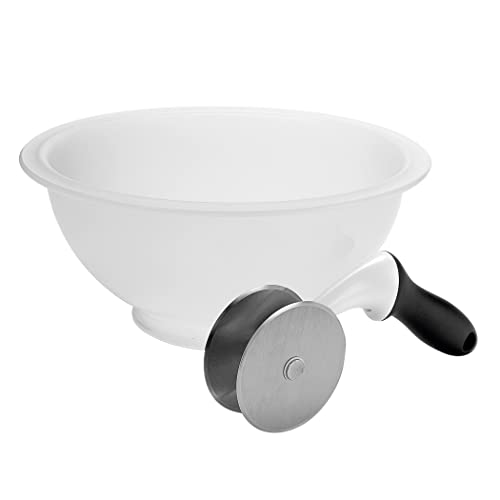
Quickly and easily transforms vegetables into chopped salad

RINSE, CHOP & SERVE: Wash produce, place the slotted guide over the bowl, chop through the slots, then lift and serve with less mess.
What Is the Right Way to Press Down on a Vegetable Chopper for Even Chopping?
Press down firmly and steadily—this is your force control. You don’t need to slam the chopper quickly; a controlled, downward pressure produces the best results. Adjust the amount of pressure based on the food’s texture. Soft vegetables, like tomatoes or berries, require only a gentle touch, while firmer items such as potatoes or carrots need a stronger push. Once you’ve pressed down, lift the lid to check your chop. If you want a finer consistency, repeat the same controlled pressing, but avoid applying extra force to prevent turning your vegetables into mush. To keep your chopper in top condition, always remember to clean it immediately after use to prevent odour and mould from returning. For best results, ensure your chopper is placed on a stable surface, much like the quality and value found in top-rated kitchen tools. Beginners often benefit from practicing first on a firm vegetable like a carrot to master even pressure.
What to Do When Your Vegetable Chopper Blade Gets Stuck?
If your vegetable chopper blade gets stuck, the first step is to unplug the appliance to prevent injury. Never handle blades with bare hands. Remove the cover and detach the bowl from the base, then gently rotate and lift it to free the blade. Check if the blade is correctly aligned; improper attachment can cause wobbling and seizing. Inspect the underside of the blade and the shaft for trapped food or debris, and clean these areas with warm water and a soft brush. Overfilling the chopper or using large ingredients can jam the mechanism, so reduce the load and cut ingredients into smaller pieces. To maintain overall hygiene, it can also be helpful to soak glass straws in a vinegar solution to remove stubborn residue. After reassembling, turn the shaft clockwise and counter-clockwise to ensure the blade locks securely in place. If the blade remains stuck despite these steps, examine the motor shaft for damage or wear. Replacing worn parts or the entire unit may be necessary if the drive mechanism is stripped or broken. Always operate the chopper only when the blade is firmly locked in place to ensure safe and effective use. For a more durable and reliable option, consider investing in a high-quality tumbler for your daily coffee needs. For lengthy fermentation projects, using glass brewing bottles with secure seals can help prevent similar jamming issues caused by pressure buildup and debris.
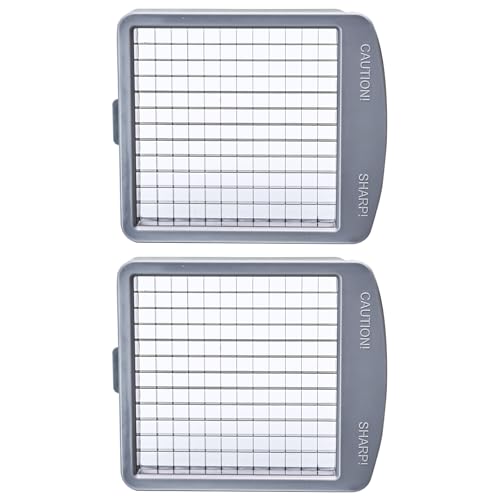
Quality materials:Use 420 stainless steel blades to increase the sharpness and hardness of the blades.

Replacement set of 3 blades and 1 cleaning tool for Brieftons QuickPush food chopper (Model: BR-QP-02).

The Original Pro Chopper – Reliable Kitchen Performance Since 2013 – Crafted for everyday cooking, this durable chopper makes meal prep faster and easier. Slice, dice, and chop fruits, vegetables, and more with precision in seconds. Its sturdy build, quick setup, and easy-to-clean design save you time and effort, helping you create fresh, healthy meals with less hassle. A trusted, professional-grade tool designed to make your kitchen work effortless and efficient.
How to Clean Your Vegetable Chopper the Easy Way?
Once you’ve freed a stuck blade, the next step is a thorough clean. Disassemble all removable parts immediately to prevent dried-on residue from hardening and becoming more difficult to remove later. Carefully isolate the sharp blades and wash them with a soft brush, avoiding your fingers to prevent injury. Use warm, soapy water and a soft sponge on all components; steer clear of abrasive pads that could scratch plastic surfaces or dull the blades. For stubborn bits of food or residue, soak the parts for a few minutes before rinsing thoroughly. If your chopper has a lid with a cord mechanism, simply wipe it down with a damp cloth instead of submerging it in water. After washing, inspect the blades closely for any leftover particles or signs of rust. To prevent clogs and odors, follow the same thorough rinse and drying process recommended for mesh strainers. Additionally, storing parts completely dry will stop odour and mould from returning. Dry each part completely with a clean towel to prevent mold growth. Maintaining this quick routine keeps your vegetable chopper in top condition, ready for your next recipe and easier to store without moisture lurking. If you also use a manual drink mixer, its removable parts benefit from the same immediate disassembly and gentle washing to prevent residue buildup.
Why Drying Every Part of Your Vegetable Chopper Matters Before Storage?
Drying every part of your vegetable chopper before storage is essential for preventing lingering moisture. Water trapped in blades, hinges, seals, and textured components can stay in contact with food-contact surfaces even after washing. This residual moisture promotes rust on metal edges, reducing sharpness and increasing the risk of corrosion. Additionally, moisture in crevices fosters mold and mildew growth, which can cause unpleasant odors. Ensuring all parts are thoroughly dry prevents these issues, keeps seals and plastic fittings from weakening, and stops parts from sticking together. Proper drying creates a dry microenvironment that protects your chopper from damage and maintains food safety. Use a towel or air-dry each piece completely—neglecting this step can compromise your utensil’s longevity and performance. For similar care, the same principle applies to other kitchen appliances: proper drying is key to preventing rust on metal blades and other components. For similar care, Cuisinart ice cream makers also require thorough drying of their freezer bowls to prevent rust and mold.
How to Tell When It’s Time to Replace Your Vegetable Chopper?
You should replace your vegetable chopper when the blades are visibly chipped, bent, or rusted beyond cleaning. Damaged blades tend to leave uneven cuts or refuse to sharpen, which can compromise hygiene and efficiency. Additionally, if the blades no longer function properly or cause the chopper to produce inconsistent results, it’s time for a replacement.
Examine the body of the chopper for cracks, wobbling parts, or signs of corrosion. Rust on metal parts or pitting on the frame can harbor bacteria and make thorough cleaning impossible. Worn moving parts that grind, lock up, or produce excessive noise also indicate internal wear. When safety locks fail or repair costs escalate, replacing the chopper before it breaks during use is the safest choice.
Quality materials:Use 420 stainless steel blades to increase the sharpness and hardness of the blades.

Quality materials:Use 420 stainless steel blades to increase the sharpness and hardness of the blades.

【 1/4''Uniform Cutting】Compared with the traditional manual knife cutting,Vegetable chopper blade is more convenient and quicker cut vegetables and fruits into uniform strips or cubes.
Why Prepping Vegetables Before Chopping in a Vegetable Chopper Saves Time?
Prepping your vegetables before they go into the chopper can save you about 25 to 30 minutes on weeknights. By washing, peeling, and trimming all your vegetables in one session, you avoid handling the produce multiple times, which streamlines the process. Uniform pieces feed through the chopper smoothly, reducing the need for re-cutting or corrections. Batch prep also allows you to work more efficiently, making the most of your time and reducing overall kitchen fatigue. Additionally, pre-planning your flavor pairings—like combining bell peppers with onions—can speed up meal assembly. With less cleanup and fewer stops, you can cut down dinner prep time from over 45 minutes to under 15, making weekday cooking much more manageable.