Wondering how to take apart your Hydro Flask straw lid without damage? If you need to clean it thoroughly or replace worn seals, knowing the right steps makes all the difference. With a few simple techniques, you can safely disassemble the lid and keep it leak-free.
Keep reading for a clear, easy breakdown of the process.
What to Remove First From Your Hydro Flask Straw Lid
Start by removing the lid from your Hydro Flask first. This creates a stable, empty surface to work on and prevents twisting stress on the bottle threads. Next, gently pull the straw straight off, using a firm but direct tug to avoid damaging the friction fit. With the straw out, open the spout to a 45-degree angle. This position aligns internal grooves and makes it easier to release the spout without risking damage to the hinge. Then, push the spout sideways and lift it upward to pop it out. Removing these main parts exposes the area under the mouthpiece for thorough cleaning. Following this sequence helps prevent stress on smaller components and keeps your parts organized during cleaning and storage. Save any small inserts for last to avoid losing them. For additional convenience, remember that this disassembly approach mirrors the direct tug technique recommended for removing blender lids to avoid unnecessary strain. To achieve the best cleaning results, ensure you use a shake-and-rinse method with warm soapy water directly inside the bag to dislodge trapped debris from the spout mechanism. Using mild dish soap on a soft brush each time will effectively remove residue without damaging the silicone seal.
Find and Remove the 3 Hidden Silicone Seals
Once the main lid assembly is disassembled, you will find three hidden silicone seals positioned in specific recesses. Start by removing the straw insert seal: grip its tab and gently pull the red silicone insert out from the bottom. Next, locate the smaller vent-area silicone piece and carefully use your fingernail to lift it from the underside. Lastly, remove the large O-ring situated under the threads with a nonmetal tool—this prevents damage to the silicone material. For added durability, a plastic strainer with handle can assist in rinsing these small parts without losing them down the drain.
Inspect each seal thoroughly. Check for trapped grime in the grooves that could hinder sealing, and look closely for cracks, flattening, or deformation. If any seal appears stretched, cracked, or otherwise damaged, do not reuse it. Instead, opt for a proper gasket replacement, which Hydro Flask sells separately. Before reassembling, wipe each groove to remove debris, ensuring each silicone piece sits flush within its original channel. Handle all seals gently—forceful prying or squeezing can cause tears or deformation, compromising the seal’s effectiveness. Using specialized cleaning tablets can effectively remove residue from the seals without harsh scrubbing. A periodic deep cleaning with tablets like Bottle Bright helps maintain these seals and prevents grime buildup in hard-to-reach areas.
Aim for a proper ratio of cleaning agents to water for optimal results, similar to how a smoothie balances liquid and fruit.

Perfect Fit: Rubber seal is Only compatible with 4 types of Hydro Flask wide mouth bottle caps: wide flex straw cap, wide flex cap, wide flex sip cap, wide flex chug cap

Compatible Sizing: Only fit hydro flask wide mouth flex cap 20 oz, 32 oz, 40 oz and 64 oz. Fit Hydro Flask Wide Flex Straw Cap 16oz, 24oz, 32oz, 40oz and 64oz. Not fit hydroflask tumbler, not fit narrow standard mouth lid or coffee lid
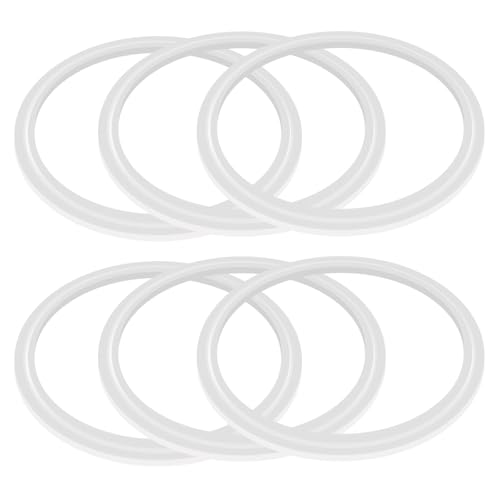
Specific Compatibility:Replacement gaskets, perpect fit for 4 kinds of original HydroFlask wide mouth water bottle lid,Included:wide Flex straw cap,wide Flex cap,wide Flex sip cap,Wide Flex Chug Cap,like picture shown.Note:Not for other brands wide mouth lid compatible with hydroflask water bottle.
How to Wash the Straw Lid Without Damaging Silicone
To clean your Hydro Flask straw lid without damaging its silicone seals, use warm, soapy water and a soft sponge or brush. This gentle method keeps the silicone material flexible and intact. Wash the lid after each use to prevent residue buildup that can affect sealing performance. Avoid harsh chemicals like bleach or chlorine, as they can degrade silicone over time.
Use a soft-bristled brush, such as Hydro Flask’s Straw and Lid Cleaning Set, to carefully scrub grooves and spouts. This ensures thorough cleaning without stretching or tearing the silicone parts. While you can rinse components thoroughly under running water, limit dishwasher use to the top rack only if you choose to wash in the dishwasher. Handwashing remains the safest option to prolong silicone longevity and maintain leak-proof performance. Be gentle when handling the silicone parts to prevent damage and ensure they stay flexible and functional over time. For layered smoothies, blending gentle ingredients first creates a stable base that prevents the layers from mixing prematurely. For efficient juicing of citrus fruits, you can apply a similar gentle reaming motion used with a handheld reamer to avoid damaging delicate silicone components. A citrus reamer is best for manual extraction as it uses a gentle twisting motion that preserves silicone seals.

6 PACK Bottle Brush SET: Includes 3 × 4-in-1 Cup Lid Cleaning Brush with u-shaped silicone brush, stiff corner brush, soft bristled brush and hook remover, 3×straw brushes for tumblers, mugs, baby bottles, and narrow containers

Package Includes: 1* long handle silicone bottle cleaning brush, 1*4 in 1 multifunctional cup cleaning brush, 3 different sizes of straw brush, specially designed for Owala water bottles, thermoses, and drink tumblers of all sizes, from 16oz, 20oz, 24oz, 25oz, 30oz, 32oz, 40oz, etc. Strong stain removal, easy to use, easy to store and hang, they are a must-have cleaning gadget for the kitchen.

Multi-Function Cleaning Kit: This set includes 10 straw cleaner brush extra long and 2 3-in-1 cup lid cleaning brushes. The stainless steel straw cleaners reach deep to clean narrow straws and tubes, while the 3-in-1 cup lid gap cleaning brushes come with a hook remover, gap brush, and stiff-bristled corner brush, making them suitable for various scenarios.
Dry It Right to Get a Leak-Free Seal
A freshly cleaned Hydro Flask straw lid sometimes leaks because it isn’t dried properly. Moisture left in the seal channel can interfere with the tight fit, creating a path for seepage. To prevent leaks, you must thoroughly dry the cap interior, the seal groove, and the straw connection point before reassembling. A damp gasket shifts during assembly, which can misalign the seal and cause leaks. For a consistent seal, use the correct low speed when pressing the parts together to avoid misalignment. Unlike copper tumblers with lids, Hydro Flask lids require careful drying to prevent seal damage and maintain performance. You can also repurpose everyday kitchen items as ice cube molds if you do not have a tray.
Make sure all parts are completely dry, then evenly press the red seal back into its groove. It should sit flush with no lifted edges. A fully seated, dry seal maintains contact around the straw opening. After securing the seal, press the straw in firmly. Finally, test with water—if it still leaks, check that the seal is fully seated and properly aligned. Remember, complete drying is your best defense against leaks.
Why Your Lid Feels Stuck: and How to Fix It?
A dried-out seal is often the culprit behind a stuck lid, especially when it’s caused by residue buildup or mineral deposits. Friction-fit parts tend to cling tightly together when dirt or moisture creates extra drag. Beverage residue can harden under the straw and spout, while mineral deposits from water make seals and gaskets tacky. Always check that materials like silicone and plastic are compatible; when dirty or wet, they can bind more tightly. For lids with a spout, frequent spout removal can cause plastic wear on the small bumps serving as pivot points, which may loosen the spout over time. For models with a handle, checking the 40 oz tumbler with handle for similar wear can help identify other common sticking points. The metal ball in your protein shaker is a separate gadget that uses a different sealing principle to avoid such sticking issues. For proper maintenance, consult the top instruction books for cuisinart ice cream makers for guidance on cleaning similar silicone parts.
Temperature fluctuations or vacuum pressure inside the bottle can also cause the lid to stick. For safety, never force it open. Instead, run warm water over the lid to help loosen the seal. Grip the lid with a towel, twist gently while lifting slightly, then fully disassemble for thorough cleaning. Scrub the straw, spout, gasket channel, and threads with warm, soapy water to remove stubborn residue. Make sure to reseat the gasket correctly so it fits snugly but moves smoothly again.

CLEANS WATER BOTTLES, SOFTFLASKS & COFFEE TUMBLERS: Kit includes a bottle brush and drying stand.

All-in-One Cleaning Solution: Our bottle cleaning kit includes 1 silicone bottle brush, 1 3-in-1 lid cleaner, and 5 long straw brushes, meeting all your cleaning needs for Hydro Flask 32oz/40oz tumblers, water bottles, lids, and straws.

【Secure Leak-Proof Flip Lid】 Our straw lid is engineered to be leak proof when closed. The secure flip top prevents annoying splashes and spills, making it perfect for tossing into your backpack, gym bag.
Which Lids Fully Disassemble (and Which Don’t)?
The Hydro Flask straw lids that fully disassemble are the Straw Cap and Flex Straw Cap. You can remove the spout, pull out the straw, take off the spout seal, and sometimes pry out the vent-hole insert on certain versions. This complete disassembly allows for more thorough cleaning and better maintenance. The lid materials—silicone for the seals and Tritan for the body—are dishwasher safe, so separating these parts is safe for cleaning cycles. To unlock the lid for disassembly, you must turn it one click past its normal position. Silicone ice trays are also dishwasher safe, making them a convenient option for kitchen use. For example, a colander vs strainer choice can also depend on how thoroughly each tool allows you to rinse and drain. Just like the blue bottle cold brew can requires specific handling for optimal freshness, properly disassembling straw lids ensures no residue is left behind.
Not all lids can be taken apart in the same way. Flex Sip lids and coffee-style rotating lids only offer partial disassembly, which limits access to silicone seals and the base sections. With these lids, you cannot fully take apart the parts to scrub every nook and cranny. For maximum cleanliness and ease of maintenance, sticking with straw-cap styles is recommended since they allow for complete teardown and cleaning.

STRAW CAP BLACK: Hydration on the go just got easier with the leakproof, insulated Flex Straw Cap. Add it to your favorite Wide Mouth Hydro Flask bottle to easily enjoy cold hydration anywhere with an easy-to-use straw lid. The straw cap for school, sports and home is easy to flip and sip.

CAPRI BLUE STRAW CAP: Hydration on the go just got easier with the leakproof, insulated Flex Straw Cap. Add it to your favorite Wide Mouth Hydro Flask bottle to easily enjoy cold hydration anywhere with an easy-to-use straw lid. The straw cap for school, sports and home is easy to flip and sip.

Top Compatibility: For ThermoFlask(18/24/32/40/64 oz), For Simple Modern Summit(10/14/18/22/32/40/64/84 oz), For Iron Flask (22/32/40/64 oz), For Hydro Flask Wide Mouth Water Bottle (12/16/18/20/32/40/64 oz).
How Often to Deep-Clean for No Buildup
If you frequently drink flavored drinks, electrolytes, or smoothies, you should deep-clean your bottle 2 to 3 times per week. Sugary residues feed odors quickly, so cleaning more often helps prevent buildup. For bottles used infrequently, a monthly deep-clean is enough, provided you rinse promptly after use and dry the bottle thoroughly. For those who also use high-performance blenders for frozen drinks, maintaining the slushie machine professional components prevents similar residue buildup and odor issues. Following a consistent setup and cleaning routine helps you avoid hidden residue in hard-to-reach spout areas.
Pay attention to signs like a persistent odor, cloudy moisture inside, or a change in taste. These are indicators that it’s time for a deep-clean. Never leave damp parts in the bottle, as mold can develop rapidly. Adjust your cleaning schedule based on how often you use the bottle, not just how it looks, to keep it free of buildup.

PACK OF ONE: One Scotch-Brite Bottle Brush, a long, multipurpose dish scrub brush with 360-degree bristle coverage for effectively reaching into deep kitchenware

Bottle cleaning brushes with multiple usage includes 7.9-12.5 inches straw tube cleaning lab brushes, 16 inches long handle beer bottle brush, 14 inches sports water bottle brush, 10 inches multifunction sponge brush and 4.3 inches spout cleaning brush; You can hang them on hook for drying and storage.

Made of non-scratch and odorless nylon bristles. Firm grey bristles on the tip are able to clean off the stubborn stains on the bottom and hard to reach areas, while the black bristles clean the body effectively.