Getting your Ninja Slushie machine spotless can often feel tricky, especially when you want to keep it running smoothly. Regular cleaning not only maintains the machine’s appearance but also ensures the best flavor and performance.
In this guide, you’ll learn simple steps to properly clean your slushie maker, from quick rinses to deep cleaning techniques.
Keep reading to discover how to prevent mold and keep your machine in top shape.
Why Cleaning Your Ninja Slushie Machine Matters
Cleaning your Ninja Slushie machine is essential after each use because those sticky residue build-ups create perfect conditions for bacteria and mold to grow. Leftover syrup, fruit solids, and sweeteners harden inside the machine, risking contamination and off-flavors in future batches. For a reliable alternative that avoids these issues, consider a 40 oz tumbler with handle for serving your slushes without the risk of machine residue. Regular cleaning removes these residues promptly, helping you maintain the fresh, crisp texture and taste of your slushes. It also ensures that internal parts like seals, gaskets, and augers function smoothly without sticky deposits causing clogs or wear. Consistent cleaning not only extends your machine’s lifespan but also keeps it running efficiently, prevents unpleasant odors, and guarantees every batch tastes as good as the first. Skipping cleaning may lead to buildup that’s harder to remove later, so it’s best to clean thoroughly after each use for optimal performance and safety. To prevent residue from hardening, machine cleaning instructions specify fully cleaning the unit after each use and before storage. For best results, use warm soapy water to easily dissolve and rinse away any remaining sugary film. For a similar approach to maintaining other kitchen tools, disassembling removable parts makes the process far more effective.
Quick Rinse Your Ninja Slushie Machine After Every Use
After each use, give your Ninja Slushie machine a quick rinse to prevent residue from hardening. First, dispense any remaining slush into a bowl. Then press the Rinse button to start the flush cycle. Add warm water up to the max fill line—64 oz for standard models, 112 oz for the SLUSHi Max. Let the auger circulate the water for about one minute, then press Rinse again to stop. Immediately drain all the water to remove any loosened residue. If residue remains, repeat the rinse cycle. This quick cleaning prevents sticky buildup and helps preserve the flavor of your next batch. Removing leftover drink also aids in temperature regulation, so the machine won’t struggle with frozen remnants. Finish by wiping down the vessel and dispensing area—do not leave parts wet. Ensure the machine is emptied prior to starting for the rinse cycle to work effectively. As with a stuck tumbler lid, applying steady force or a slight twist can sometimes dislodge stubborn residue around the machine’s seals. Using a cold brew can approach, you can also pre-chill ingredients to minimize splashing during the rinse cycle. For deeper cleaning, a soft bottle brush can help reach tight crevices without scratching the glass components. You’re now ready for your next icy creation.
Deep-Clean the Interior of Your Ninja Slushie Machine
To deep-clean the interior of your Ninja Slushie Machine, start with a soap-and-water rinse cycle for the internal chamber. Fill the vessel to the maximum fill line with warm water and add 1 to 2 drops of dish soap. Run the rinse program for about one minute to loosen and remove residues. Dispense the cleaning solution and then repeat with clean water until no suds remain. This step is essential for cleaning surfaces that contact the slush mixture, removing sticky buildup and residues. For comparison, best juicer machines for fresh orange juice require similar thorough rinsing to prevent pulp buildup, much like how a top-rated clear ice maker requires diligent maintenance for optimal performance.
Next, wipe down the evaporator and cooling cylinder with a warm, damp cloth. Focus on areas where frozen mixes tend to cling or where residue buildup occurs, especially in corners and around hardware. Avoid abrasive scrubbers, which could damage these delicate components. Be thorough in cleaning under and around all parts of the interior hardware to prevent residue from settling and causing odors or contamination. Additionally, use the spout to release rinse water into a bowl for proper disposal. For optimal consistency in your frozen treats, a blender for smoothie bowls uses similarly powerful blades to break down thick ingredients.
Finally, ensure all internal liquids are fully drained by tipping the vessel downward and allowing rinse water to escape. Check the condensation catch area and remove any accumulated moisture. Dry all interior surfaces thoroughly with a clean cloth and let the unit air-dry before the next use. Proper drying helps reduce lingering odors and prevents mold or residue buildup caused by leftover moisture.

Designed for Ninja SLUSHi: Built to tackle the notoriously hard-to-clean narrow crevices of your machine. This dedicated kit effortlessly flushes out sticky syrup from blind spots where odors and mold hide. Tested on 88oz models (FS301, FS299, FS305CO) and made for any SLUSHi with the same crevice
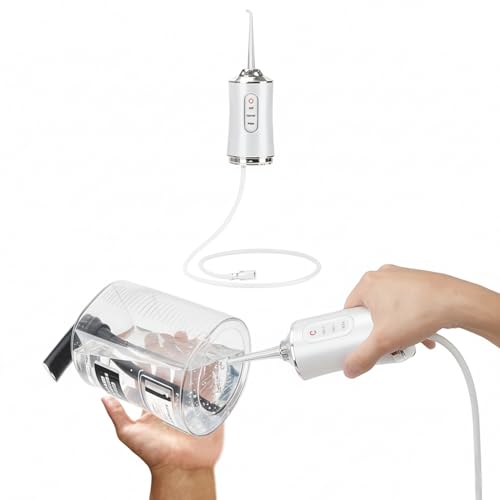
🚀 Plug & Play Tool-Free Cleaning – Designed for Ninja Slushie Machine FS301/FS300, target residue areas with one button, and deep clean in just 30 seconds!

Value Pack: You'll get an ice machine cleaning brush kit that includes 2 extra-long pipe cleaning brushes and 8 crevice cleaning brushes, enough styles to meet your cleaning needs
Remove and Wash All Removable Parts
Removing and washing all removable parts of your Ninja Slushie Machine is essential for maintaining optimal performance and taste. First, unplug the unit to ensure safety. Detach the vessel, pour handle, auger, condensation catch, drip tray, and spout shroud. Carefully separate each part, especially around seams and in crevices, to remove any residue or buildup that could affect flavor or operation. Wash them in warm, soapy water using a soft sponge—avoid harsh abrasives that might scratch plastic surfaces. To ease cleaning, place dishwasher-safe parts on the top rack and skip heated dry cycles to prevent warping or damage. Rinse each piece thoroughly to eliminate soap film, which can cause unwanted foaming during use. Dry all parts completely before reassembling to prevent mold and bacteria growth. Regular cleaning of these components also helps ensure proper power calibration, resulting in consistently smooth and well-textured slushies. For thorough cleaning, add a drop or two of dish soap to the warm water when washing the parts to break down stubborn residues.

Comprehensive 4 Piece Brush Kit
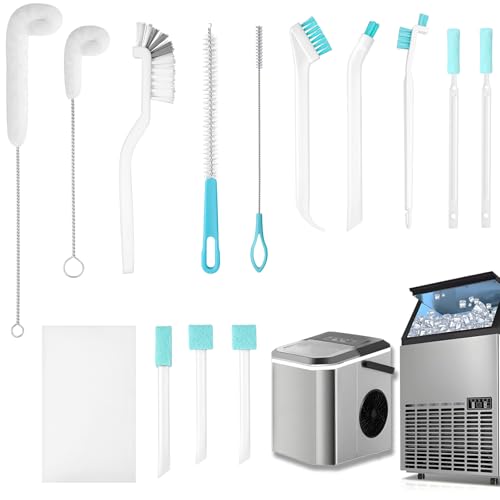
【Complete 14 Piece Set for Every Task】Includes specialized brushes, duct cleaning brushes and crevice brushes for ice makers. No need to buy tools separately, Potanro ice machine cleaner brush sets perfect for tackling narrow gaps, pipes, and hidden corners effortlessly.

Easy to Operate & Multi-Purpose: The white elbow soft brush and handle are long and can be bent into a round shape. It is used to clean metal columns and keep them clean at all times. It has multiple purposes and can also clean keyboards, nipple, air outlet, mug lid seam.
Best Way to Wipe Down the Machine Body and Evaporator
After washing and drying the removable parts, focus on cleaning the machine body and evaporator. Use gentle techniques: wipe the evaporator with a soft, damp cloth after each rinse cycle ends. Apply light pressure to remove any drink film or sugar residue from the metal surface without scratching it. First, turn the unit off before cleaning the motor base and control panel with a damp cloth—make sure it’s not dripping. Keep water away from electronic components and never submerge any part of the machine surface. Quickly wipe away splashes and sticky spots to prevent buildup. To help reduce drips, slide out the condensation catch regularly. For a thorough clean, slide the condensation catch out of the unit and set it aside before wiping the evaporator. The main goal is to remove residue without heavy scrubbing, so avoid applying excessive pressure. Allow the wiped areas to air-dry completely before reassembling the machine. When cleaning similar silicone or plastic parts, using a soft, damp cloth is the safest method to avoid scratches and damage. For comparison, many premium drinkware options like Starbucks tumblers also recommend gentle hand washing to preserve their finish. For sticky residues without a blender, using a fork to crush Oreos inside a sealed bag offers a simple alternative for manual cleanup.

【Efficient Cleaning and Dusting】This damp clean duster towel is made of special sponge material, which has excellent absorbency and dust removal ability. With efficient...
Why You Must Dry Every Part Before Reassembly
Dry every part thoroughly before reassembling your machine. Even if it looks clean after washing, residual moisture in seams, hinges, and channels can create ideal conditions for mold and mildew. These hidden water spots often lead to unpleasant odors and unsightly stains. Moisture buildup not only looks bad but can also damage the fit and alignment of the components over time.
Air drying with openings facing down is essential. Inspect spouts, lids, and trays carefully to ensure no droplets remain. Use a clean towel to wipe off any lingering moisture and confirm everything feels completely dry, with no condensation. Pay special attention to thick plastic parts, as they may take longer to dry. Rushing this step risks trapping hidden water in the base, leading to drips, residue buildup, and potential damage. Keeping each part fully dry guarantees your machine stays clean, odor-free, and functions reliably.
How to Reassemble Your Ninja Slushie Machine Correctly
After all parts are completely dry, you’re ready to reassemble your Ninja Slushie Machine. Start by placing the motor base on a flat, dry surface to ensure proper alignment of the motor. Next, slide the condensation catch into the rail grooves beneath the evaporator, making sure it sits smoothly without using force. Then, fit the auger over the evaporator and rotate it until the pin engages securely; this step is crucial to prevent leaks and maintain effective operation. The motor base uses rapid chill technology with 360° rotation to maintain the ideal temperature and texture for each frozen drink. For those who also appreciate hot beverages, choosing a Best Coffee Tumbler can keep your coffee at the perfect temperature for hours. To maintain proper hygiene, it is recommended to wash the lid and straw by hand with hot soapy water after each use. As with other kitchen appliances, understanding the correct part order ensures no damage occurs during assembly. Lift the bail handle, slide the vessel over the auger and evaporator, and then push the handle back down to lock it into place. Finally, insert the drip tray into the front base, pushing until it clicks into position. Before using the machine, double-check that all parts are fully locked and properly aligned for optimal performance.
Common Cleaning Mistakes That Ruin Your Ninja Slushie Machine
To avoid ruining your Ninja Slushie Machine, steer clear of abrasive cleaners or harsh chemicals like bleach. These substances can dull blades, scratch surfaces, and leave harmful residues that may contaminate your drinks. Instead, stick to mild dish soap and warm water, using a soft-bristle brush for scrubbing.
Never submerge the motor base or electrical components in water. Moisture can cause corrosion of connectors and damage the controls. Wipe down the base with a clean, damp cloth instead. Before disassembling the machine, run the rinse cycle to clear sticky residues; skipping this step can lead to hardened buildup that’s difficult to remove later.
Only place approved parts in the dishwasher and avoid the heat-dry cycle, as it can warp plastic components. After washing, air-dry all parts thoroughly. Pay special attention to cleaning crevices around the paddle, spout, and drip tray. Infrequent cleaning in these areas allows mineral deposits to accumulate, which can stall the motor and impair performance. Cleaning immediately after use helps prevent deposits and odors from developing.

Complete Cleaning Set: Includes a comprehensive 9-piece brush collection specifically designed for deep cleaning commercial ice cream and sundae machines.
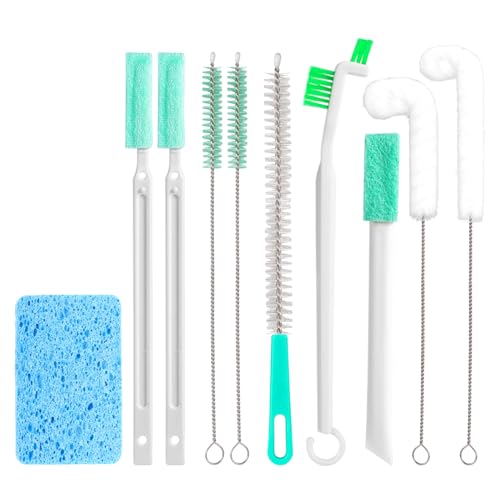
Package Includes: You will receive 10 pieces of ice machine cleaning tools, the quantity and styles are enough to meet your cleaning needs.
How Often Should You Clean Your Ninja Slushie Machine?
You should clean your Ninja Slushie Machine immediately after every use. Rinse, wash, and dry all removable parts right away to stop syrup, dairy, or fruit residue from hardening inside the vessel and auger. This consistent routine is essential to prevent buildup and maintain hygiene.
After dispensing your last drink, run a warm-water rinse cycle up to the maximum fill line. Discard that water, then disassemble all parts for a thorough hand wash with soap. First, add hot water up to the vessel’s max fill line to support the rinsing process. Be sure not to forget the drip tray or the pour handle, as residue can accumulate in these areas too. A quick rinse of removable parts immediately after use prevents sticky residue from drying on the blades. Proper cleaning after each use keeps your machine in optimal condition and ensures every slushie is fresh and tasty. Always check the seal and lid for trapped debris before reassembly. To stop odour and mould from returning, ensure every component is fully dried before reassembly, as trapped moisture is the primary cause of bacterial growth.
Easy Maintenance Tips to Keep Your Slushie Machine Running Smoothly
To keep your Ninja Slushie Machine running smoothly, perform a quick-rinse right after each use. Run a cycle with warm water and a tiny bit of mild dish soap to prevent sticky residue from setting. Follow this by rinsing with clean water until no suds remain, then fully empty the machine. Doing this regularly helps avoid buildup that can strain the machine’s performance.
Follow a simple maintenance checklist: disassemble and wash removable parts in warm soapy water, then dry them completely before reassembling. Wipe the motor base with a damp cloth—never immerse it in water. Avoid overfilling the vessel, and regularly inspect blades, seals, and bushings for signs of wear or damage. Keep condenser vents dust-free to ensure proper airflow. Storing the machine in a clean, dry place also extends its lifespan. These straightforward steps help ensure smooth operation and keep your machine functioning efficiently over time.

Universal Fit for 88oz & Smaller Countertop Slushie Machines: This slushie machine carrying bag is designed to fit most standard 88oz and smaller countertop frozen drink makers. It is compatible for INOVIVA S2.1 / S2.2 (88oz), S1.0 / S1.2 (68oz), as well as for Ninja SLUSHi FS301 FS300 FS299, Iceman, Wongic and other popular models. It serves as an ideal solution for daily home dust-proof storage and hassle-free transport to parties, family gatherings and outdoor events.

These tough small cleaning products set can meet most household use needs. Clean nooks and crannies.

Perfect Compatibility:Specifically designed for Ninja FS301 Professional 88 oz Drink & Slushie Machine, FS301C, and CyberChill SM-FS200A Slushie Machine. Ensures a snug fit to protect your smoothie/frozen drink maker from daily wear