If you’re wondering how to clean your Hydro Flask straw lid without damaging it, you’ve come to the right place. Keeping your lid spotless not only improves taste but also helps prevent mold and leaks.
In this guide, you’ll learn simple, effective steps to disassemble, scrub, and properly care for each part of your lid.
Follow along to make sure your Hydro Flask stays clean and leak-free with minimal fuss.
Disassemble Your Hydro Flask Straw Lid Completely
To disassemble your Hydro Flask straw lid completely, start by removing the lid from the bottle. Then, pull the straw straight off the friction-fit cap. Check the length of the straw if you have trimmed it, because part compatibility is important for a snug fit when reassembling. Next, pop off the spout by pushing it past the open position. Use a fingernail to lift out the silicone gasket from its channel. The lid material is durable, but avoid twisting aggressively to prevent wear on the connections. Detach any vent insert or hidden seal to expose any residue. Keep all small parts together to prevent losing them. This complete disassembly allows you to access every groove, making sure no buildup remains. For the most effective rinse, consider that high-speed centrifugal juicers often leave pulp in tight crevices, so a similar thorough breakdown is key. While cleaning, be aware that stainless steel straws are generally safe but can harbor bacteria if not scrubbed thoroughly after each use. Reassemble only after inspecting each piece and ensuring they are clean and dry. For long-term storage, keep the disassembled parts in a dry, breathable container to prevent moisture buildup and maintain proper air circulation.
Rinse Away Loose Debris First
Start by rinsing away loose debris with warm water immediately after disassembling the lid. This prevents dried residues from sticking inside the straw channel, spout, and hinge areas. Running water through each component helps dislodge particles, especially after sugary or milky drinks that can cause odor-causing buildup. Be sure to flush all openings thoroughly, letting water pass through the straw path and crevices. Gently shake or tap the parts during rinsing to loosen stubborn bits. Continue until the runoff runs clear, indicating the main debris has been removed. This pre-rinse phase doesn’t require cleaning tools and is crucial for a fresh, clean lid before moving on to soap and deeper cleaning. As recommended in general cleaning guidelines, using warm, soapy water for this initial rinse helps begin the thorough cleaning process. Similar to how a 12-Speed Blender benefits from immediate rinsing to prevent residue buildup, this initial rinse keeps the straw lid free of stubborn particles. For tumblers designed with leak-proof lids, this initial rinse is especially effective at preventing debris from clogging the seal and hinge areas. For best results, a durable personal cup with a similar lid design benefits from this same quick debris removal step to maintain the seal’s integrity over time.
Scrub Tight Spots With the Right Brush
To scrub tight spots effectively, use brushes designed for narrow openings. A detail cleaner with a small tip is perfect for reaching narrow seams and crevices, such as straw channels and lid edges. The Hydro Flask Straw and Lid Cleaning Set includes this type of detail cleaner, ensuring you can target areas standard brushes can’t reach. For straw interiors, a nylon bristle brush offers gentle yet thorough scrubbing without damaging the lid or seals. This set is backed by a lifetime manufacturer’s warranty from Hydro Flask, reflecting its durability and quality. Additionally, some top handle designs for 32 oz tumblers also require similar narrow-bristle care to clean their attachment points without scratching the surface. A quick soak in hot, soapy water can help loosen built-up mold and odors before scrubbing.
Work around gasket and thread areas with short, repetitive strokes to loosen stubborn residue. Choosing a brush that fits snugly into each channel guarantees direct contact with interior walls, helping remove grime from hidden spots like seal edges and tiny corners. These specialized tools prevent you from forcing larger brushes into tight bends, which can cause damage or incomplete cleaning. The right size and shape of each brush make every cleaning pass more effective and less frustrating. Applying a layered cleaning technique ensures each channel receives focused attention, much like building layers in a smoothie for consistent results.

DOUBLE THE EVERYDAY CLEANING POWER — This 4-piece bottle brush set includes two 15-inch long handle bottle brushes, so you can keep one at home and one at work, rotate between washes, or clean multiple bottles without waiting.

6 PACK Bottle Brush SET: Includes 3 × 4-in-1 Cup Lid Cleaning Brush with u-shaped silicone brush, stiff corner brush, soft bristled brush and hook remover, 3×straw brushes for tumblers, mugs, baby bottles, and narrow containers

2 In 1 Bottle Cleaning Brush: Bottle brush with a hidden straw brush stored inside the handle, unscrew to reveal a long, flexible brush for easy straw cleaning.
Wash the Hydro Flask Lid in Warm Soapy Water
Disassembling the lid is the first step before washing it in warm soapy water. Use mild, bleach-free dish soap to ensure it remains gentle on the silicone seals and plastic parts. Warm water helps loosen oils and residues effectively, making cleaning easier without causing damage. Submerge all pieces, including the straw and gasket, and gently scrub them with your hands or a soft cloth. Be sure to clean in seams and threads where buildup can occur. For best results, clean the gasket carefully to remove trapped debris that can harbour odour and mould. Rinse each part thoroughly under clean running water until no soap residue remains. This ensures a neutral taste and prepares the components for proper drying. Regular cleaning after each use prevents buildup and maintains the lid’s condition. Warm soapy water is your go-to cleaning method for routine maintenance and for addressing deeper stains or odors when necessary. For the best cleaning results, consider using a Ninja Slushie Machine to help blend cleaning solutions thoroughly. To avoid damaging the delicate parts, always remember to use mild, bleach-free dish soap during this process.

【 3 in 1 Cleaning Brush】3 in 1 bottle brush with a hook remover, stranded slit brush and stiff bristle corner brush, makes easier to clean coffe cups or mechine, tea cups, milk bottles, ice grids, molds, peelers, etc.

Perfect Fit: Straw lid and boot perfectly fit BUZIO Hydro Flask wide mouth and other brand water bottle with 2.2 inches wide mouth. It's the perfect stainless steel water bottle accessories for your active, on-the-go lifestyle.
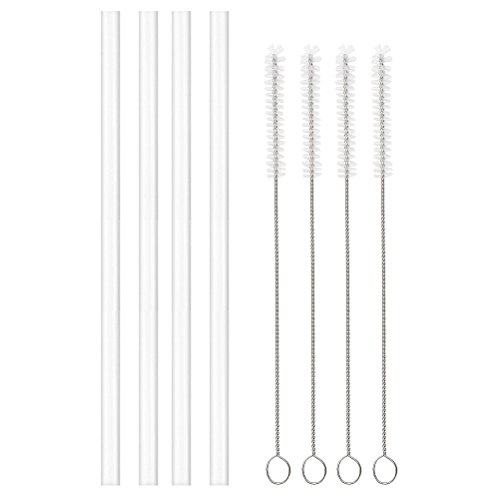
Includes 4 silicone straws and 4 straw cleaning brushes
Soak Tough Buildup Without Ruining Seals
To soak tough buildup on your Hydro Flask lid without damaging the seals, keep the soaking time between 10 and 30 minutes. Start by removing silicone gaskets and O-rings, then soak them separately in warm, soapy water, diluted vinegar, or a baking soda solution. Use gentle cleaners to avoid chemical damage; avoid undiluted vinegar or harsh degreasers, as they can ruin silicone. Focus on cleaning buildup in lid channels and seal grooves. After soaking, use a soft brush to loosen deposits without deforming the seals. Do not extend the soak beyond the recommended time, as overexposure can harm the silicone parts. Rinse all parts thoroughly until water flows clear, then dry completely to prevent moisture entrapment and odors before reassembling. For cups with a handle, you can also apply this method to the handle’s crevices, just as quality and value tumblers require careful maintenance to preserve their seals. While scrubbing, use a gentle speed or motion similar to what the milkshake maker requires for proper agitation to avoid damaging delicate components. Similar care should be taken to avoid harsh scrubbing on the basket and bowl of a Farberware salad spinner to prevent surface damage.

【 3 in 1 Cleaning Brush】3 in 1 bottle brush with U-shaped silicone brush, stranded slit brush and stiff bristle corner brush, makes easier to clean coffe cups or mechine, tea cups, milk bottles, ice grids, molds, peelers, etc. In addition, the eyes of this crocodile brush are designed to prevent hands from slipping off during the cleaning process.

All-in-One Cleaning Solution: Our bottle cleaning kit includes 1 silicone bottle brush, 1 3-in-1 lid cleaner, and 5 long straw brushes, meeting all your cleaning needs for Hydro Flask 32oz/40oz tumblers, water bottles, lids, and straws.
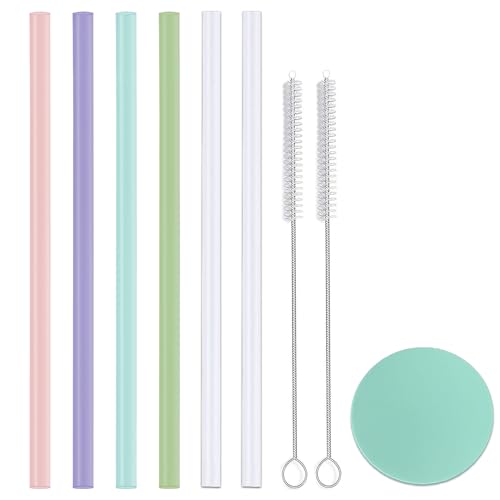
Perfect fit: 8.5 mm straws for hydro flask wide mouth straw lid. 6 pcs hard thick plastic straw perfect fits hydro flask 18 oz, 20 oz, 24 oz, 28 oz, 32 oz, 40 oz and 64 oz wide mouth water bottles, straw for Iron flask bottle with straw lid. 9.85'' L×0.33'' W.
Place Dishwasher-Safe Parts on the Top Rack Only
Always place dishwasher-safe parts on the top rack only. This is crucial for maintaining the integrity of your Hydro Flask lid and straw. The top rack keeps these components away from the intense heat of the heating element in the bottom of the dishwasher. Excessive heat can warp plastic parts, compromising the seal and fit. Before washing, disassemble the lid and place the pieces loosely to allow water to reach all surfaces. Avoid overloads and heated dry cycles; air-drying or using a gentle cycle helps preserve the parts. Once the cycle finishes, promptly remove the components for proper storage. You can store them fully assembled or disassembled in a dry location, but never place lids or parts on the bottom rack. Handwashing is a safer alternative if you’re uncertain about the care instructions or age of your lid. Prioritize top-rack placement to keep your lid in optimal shape and ensure long-lasting performance. For modern straw lids, a vinegar soak can help remove mineral buildup from hard water. As with coffee brewing, using filtered water can prevent scale from forming in the first place. To stop odour and mould returning, you must dry all components completely after cleaning before reassembling the lid.
Dry and Reassemble Only When Fully Dry
Ensure every component is completely dry before reassembling the lid. Moisture trapped inside can lead to mold growth and bad odors. To prevent this, lay all parts separately on a drying rack in a well-ventilated area, avoiding stacking them. Letting them air-dry overnight is effective for reaching hidden crevices like gasket grooves, straw interiors, and vents. Just as a lemon juicer benefits from air-drying after washing to prevent residue buildup, a similar approach ensures your Hydro Flask stays clean. For your blender’s gasket, proper placement and dryness are also critical to prevent leaks and mold.
Pay special attention to tricky spots prone to water retention. Check these areas carefully and confirm they are free of moisture. Reassembling when damp traps water inside the bottle, which can cause mold and unpleasant smells. Wait until each part feels dry to the touch before putting everything back together.
Once you’re sure all pieces are bone dry, reassemble the lid in the reverse order of disassembly. Properly dried parts will seat more securely, making leaks less likely. Only after confirming complete dryness can you safely put the lid back on your bottle for clean, fresh use.